Permission
Permissions for Roles has been enhanced so that you can control every user in a fingertip.
Permission in SERVICE WORKS:
(To control every user in a fingertip)
Setting Permissions – How to set Permission
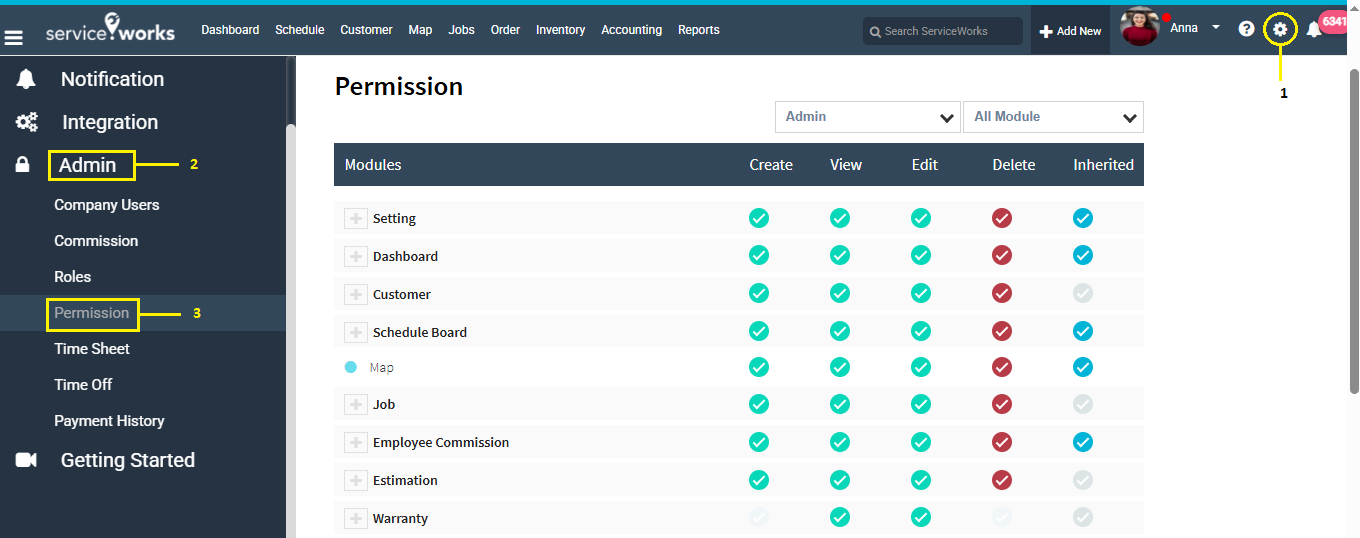
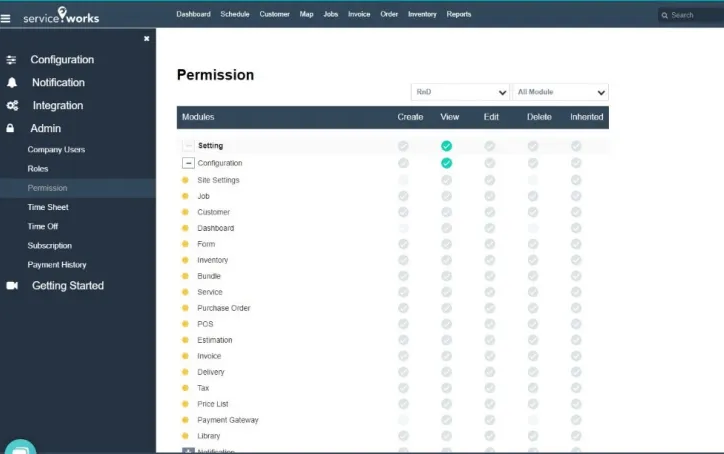
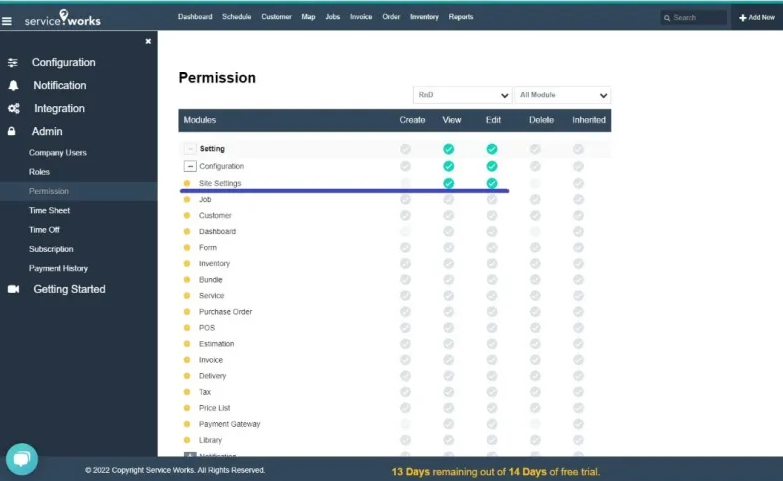
Go to Setting => Admin => Permission (Step – Click 1 => 2 => 3, as shown in the picture below).
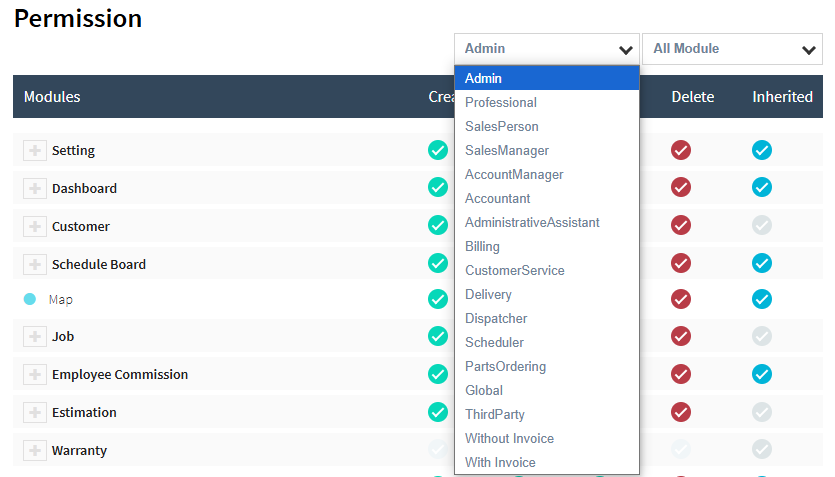
Roles in Dropdown as shown in the picture to select the desired role to configure as shown in the picture below.
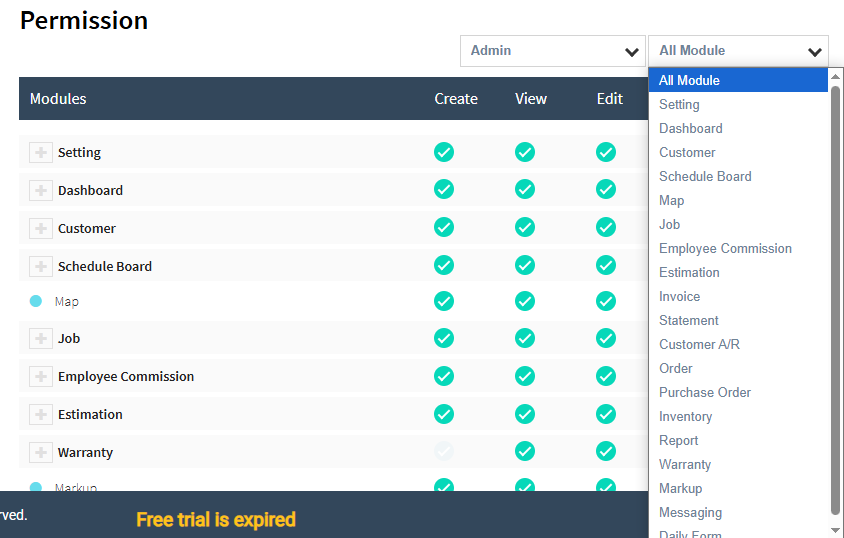
Modules in Dropdown as shown in the picture to select the desired module to configure as shown in the picture below.
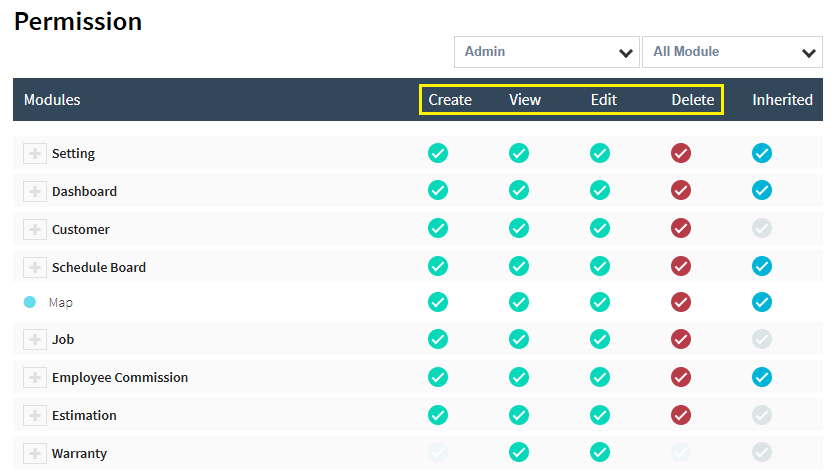
Every Module has basically 4 Major Permissions namely CREATE, VIEW, EDIT, DELETE as shown in the picture below.
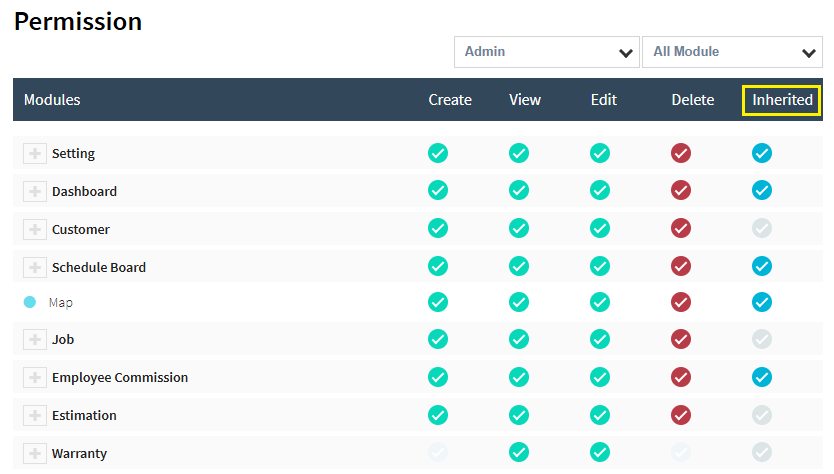
INHERITED is basically given for the ease of usability to configure the permission same as of Parent Module to its Child Modules as shown in the picture below.
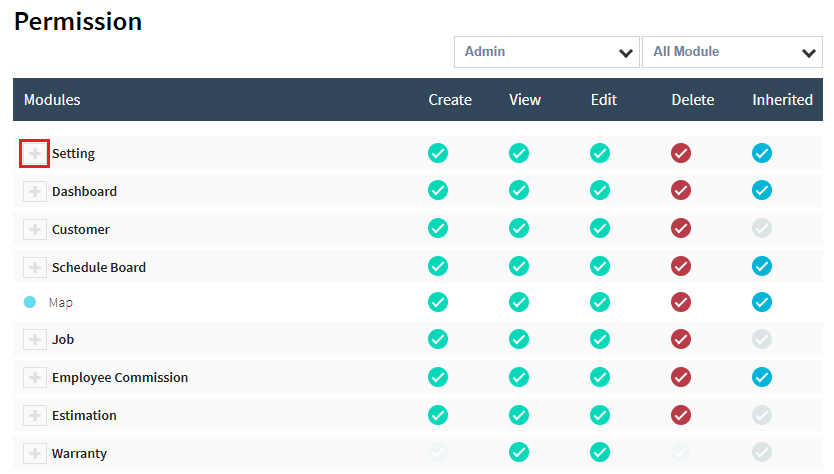
Click on the [+] button beside the Modules for the expansion of the Modules for detailed configuration of the Permissions of a specified role as shown in the pictures below.
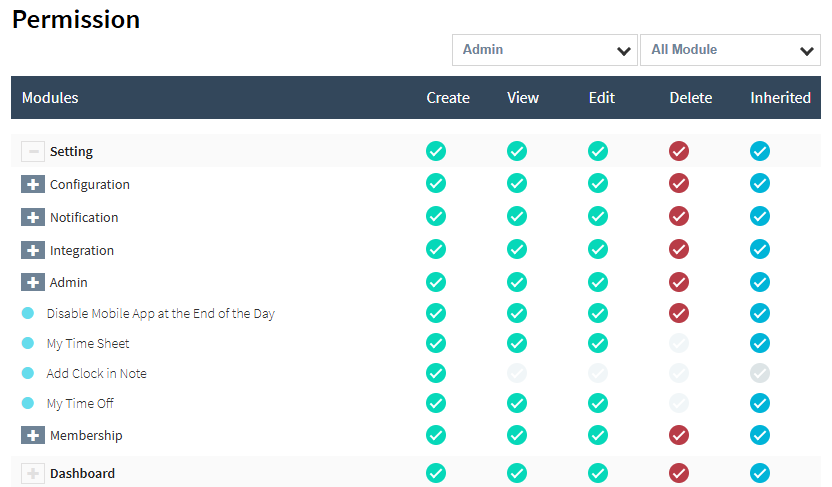
Modules are basically divided into 3 Segments –PRIMARY, SECONDARY, TERTIARY as shown in the picture below.
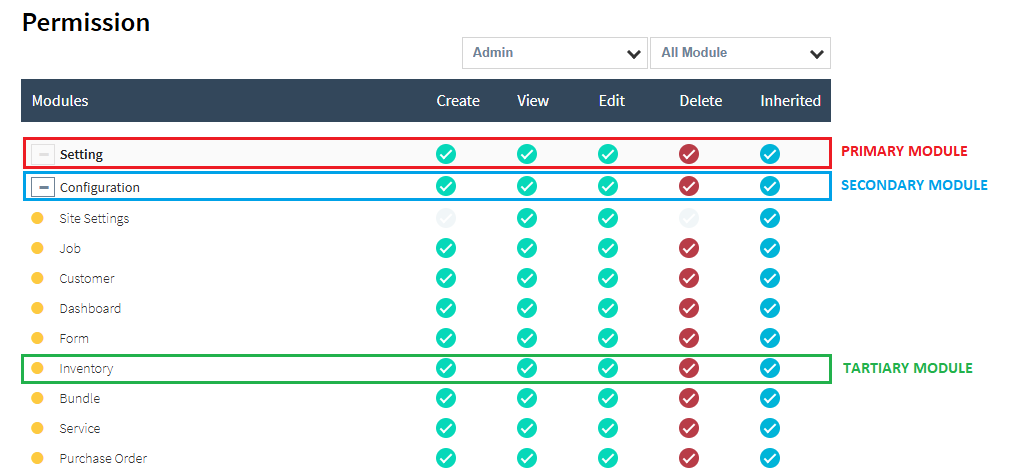
PRIMARY MODULE – It is the Parent Module
SECONDARY MODULE – It is the Sub Module under Primary Module
TERTIARY MODULE – It is the Sub-Sub Module for detailed & Granular Configuration of Permission for a Specified Role
DETAIL EXPLANATION OF THE PERMISSION MODULES:
SETTING MODULE – Primary/Parent Module
Will control over the menu present under the Setting in Service Works Application
Configuration, Notification, Integration & Admin
Getting Started will be always there by default
Explanation as shown in the picture below
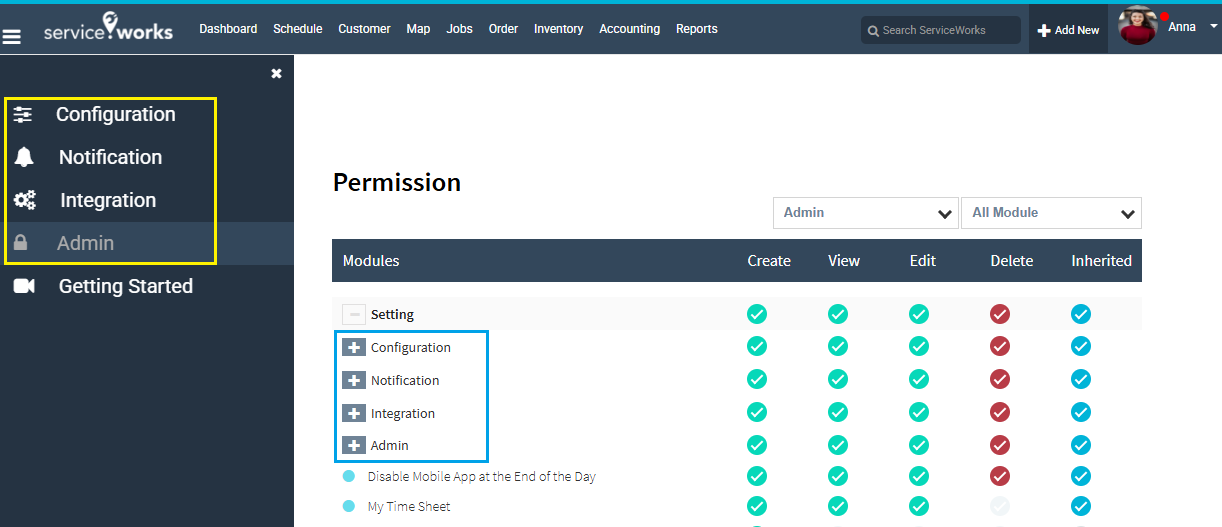
Under Setting Module there are 4 Secondary/Sub Module, i.e. Configuration, Notification, Integration, Admin
Under the Configuration Module there are 19 Tertiary/Sub-Sub Module as same on the website Configuration Menu, shown in the picture below.
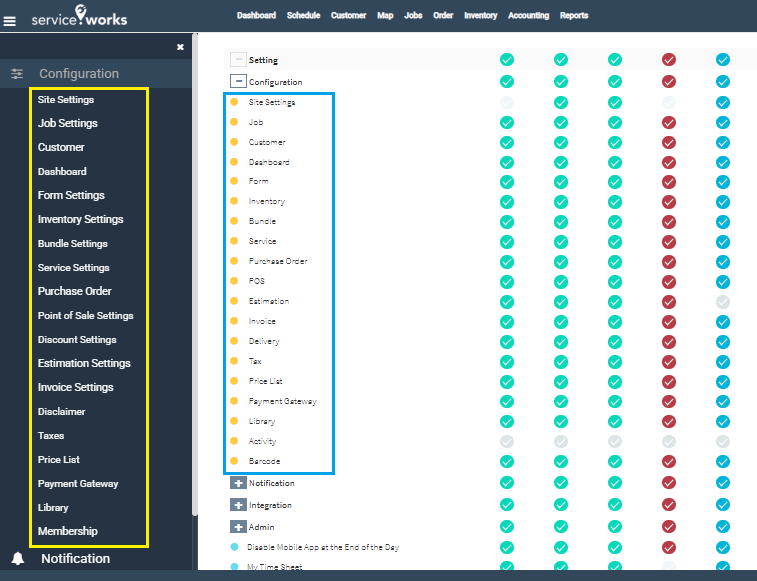
Here we can set which role can “Only View”, “Edit (View by default)”, “Create (View by default)”, “Delete (View by default).”
GETTING STARTED – PERMISSION CONFIGURATION
Role with NO Permission at all
We have created a Role (RnD) to demonstrate the Permission Configuration. The below pics will define the same. By Default, this role after creation has no permission at all.
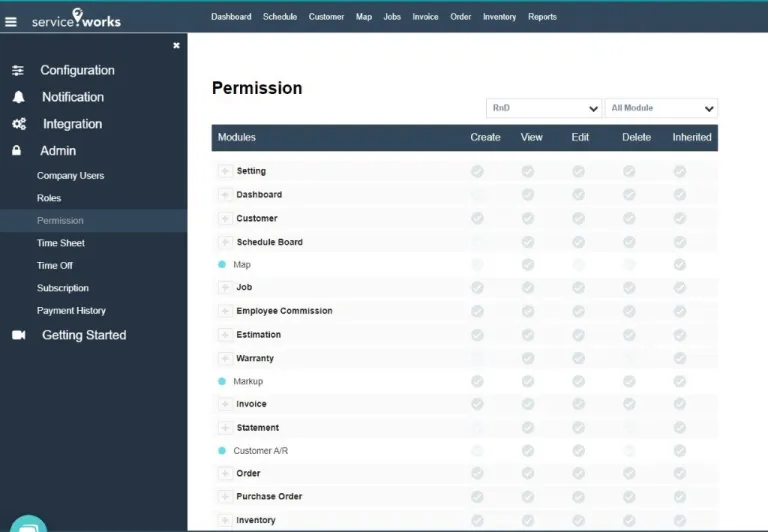
On Login with RnD the screen is as like below pics.
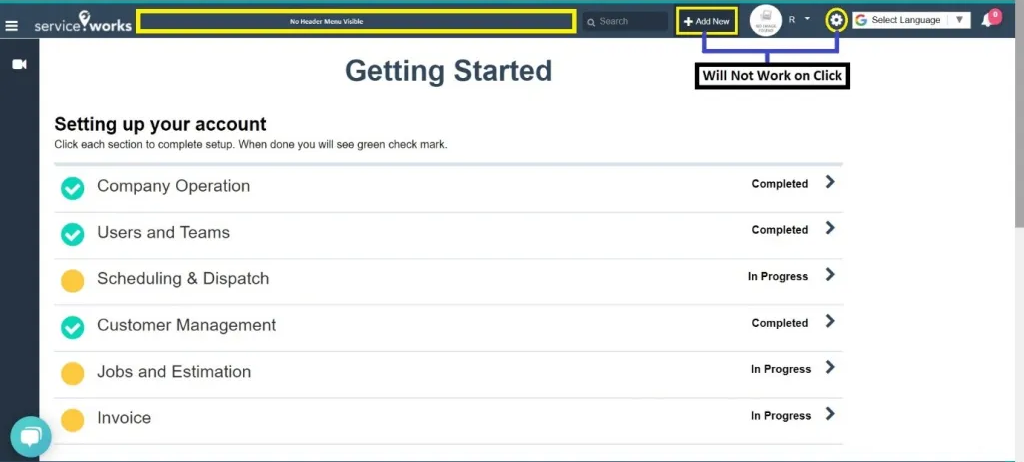
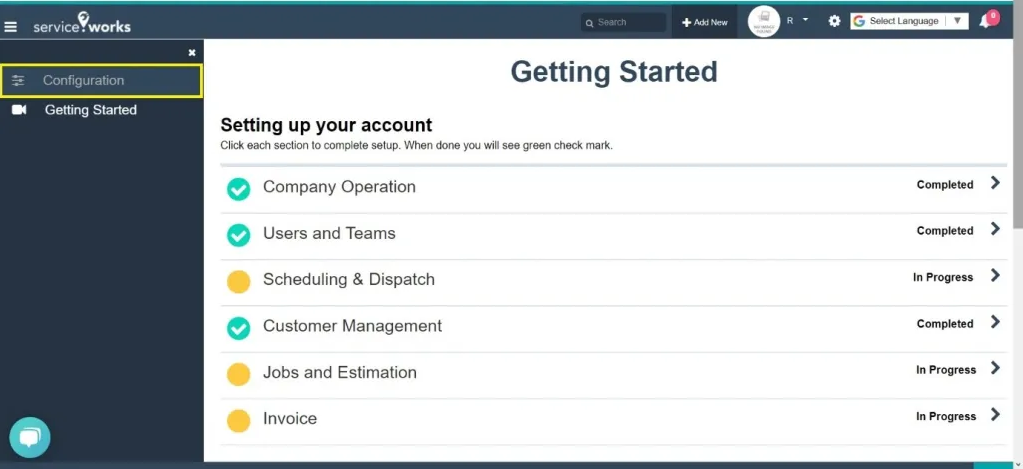
Only View Permission of Configuration
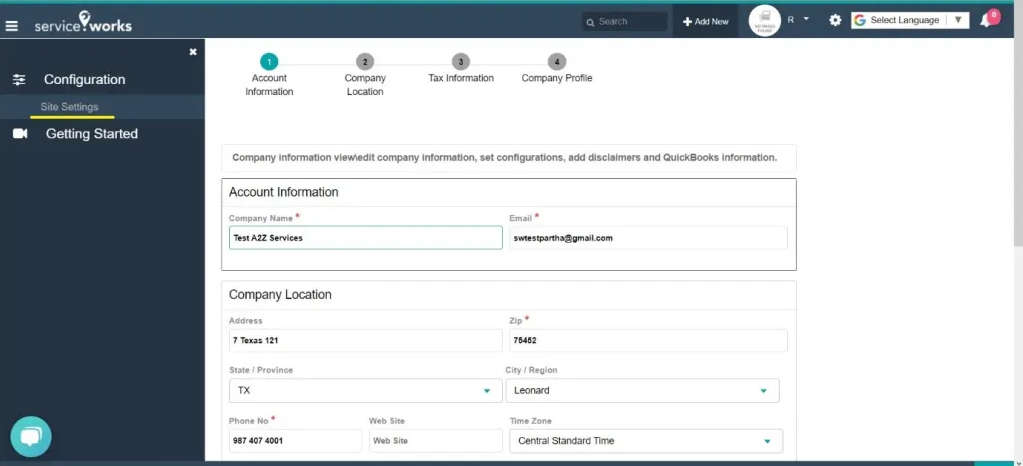
Output: Configuration Icon is now showing.
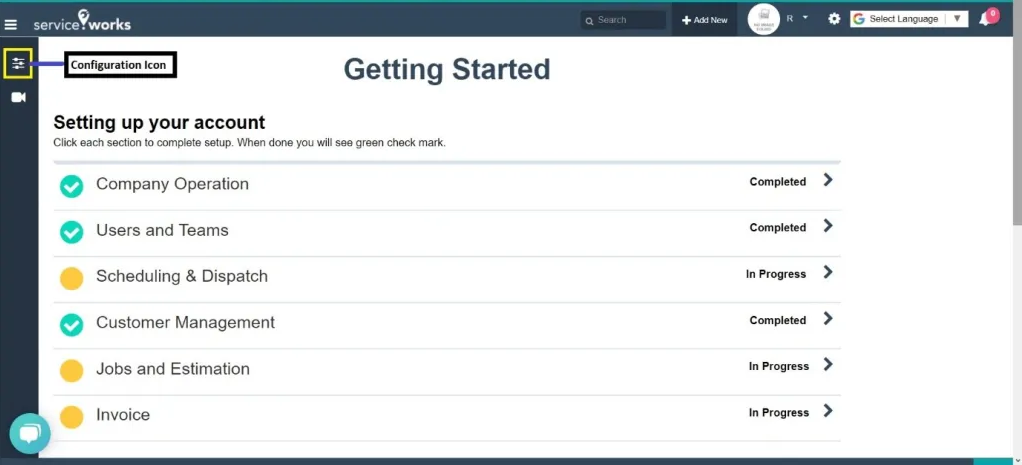
But as the Tertiary Menu Permissions are Off now so No Sub Menu under the configuration will be available.
Now we will configure View of Site Setting.

Output: Now site setting is showing but cannot edit since there is No Edit Permission so No Save Button.
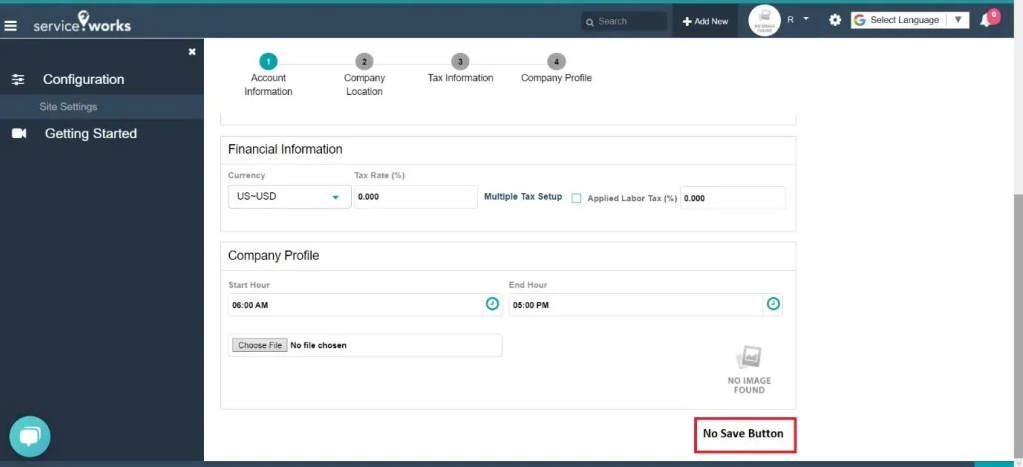
If we Give the Edit Permission.
Output: The User will get to Edit the Site Setting & Now the Save button is available.
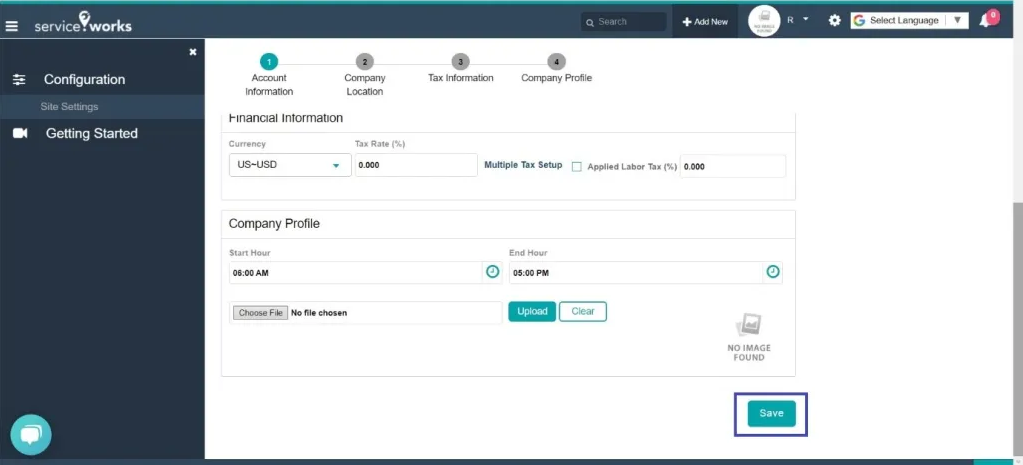
In the same way we have to configure the permission for each & every Menu.
VIEW – Will show the Particular Menu.
EDIT – Will allow us to Edit the Particular Menu.
CREATE – Will allow us to Create any Option, Fields, or anything which supports Creating in a Particular Menu.
DELETE – Will allow us to Delete any Option, Fields, or anything which supports Deleting in a Particular Menu.
Header Menu Visibility:
As we give the View Permission of the Menus i.e., Dashboard, Schedule Board, Customer, Map, Jobs, Invoice, Order, Inventory, Reports then all these menus will be visible in the Header of the Site.
Detailed Description of Modules:
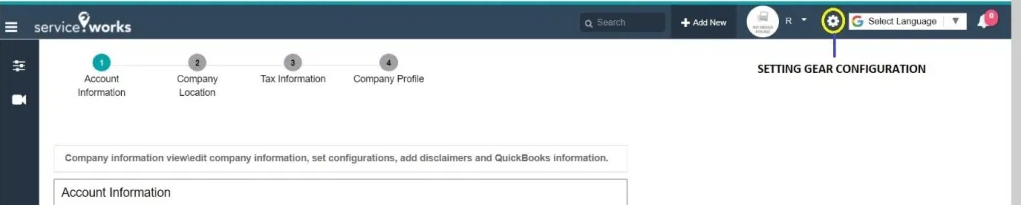
SETTING: As mentioned above this section allows us to configure the Permission related to the Configuration & the Setting Gear (Only View Permission is Given now for Picture).
DASHBOARD: This section will allow us to configure the visibility of the Dashboard and its Card Views of both Retail & Services (Only View Permission is Given now for Picture).

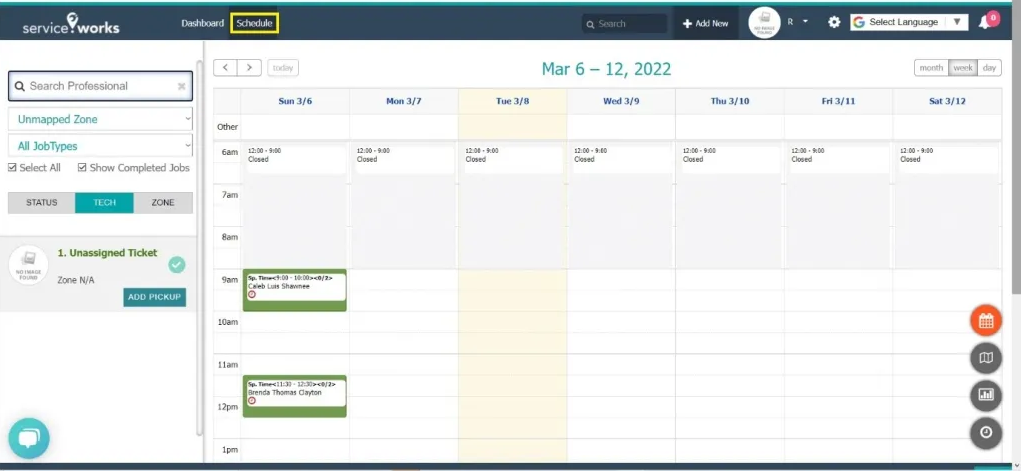
SCHEDULE BOARD: This section will allow us to configure the visibility & functionalities of the Schedule Board (Only View Permission is Given now for Picture).
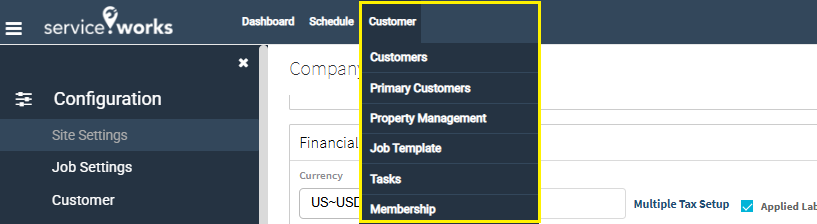
CUSTOMER: This section will allow us to configure the visibility of menu & Customer related operations (Only View Permission is Given now for Picture).
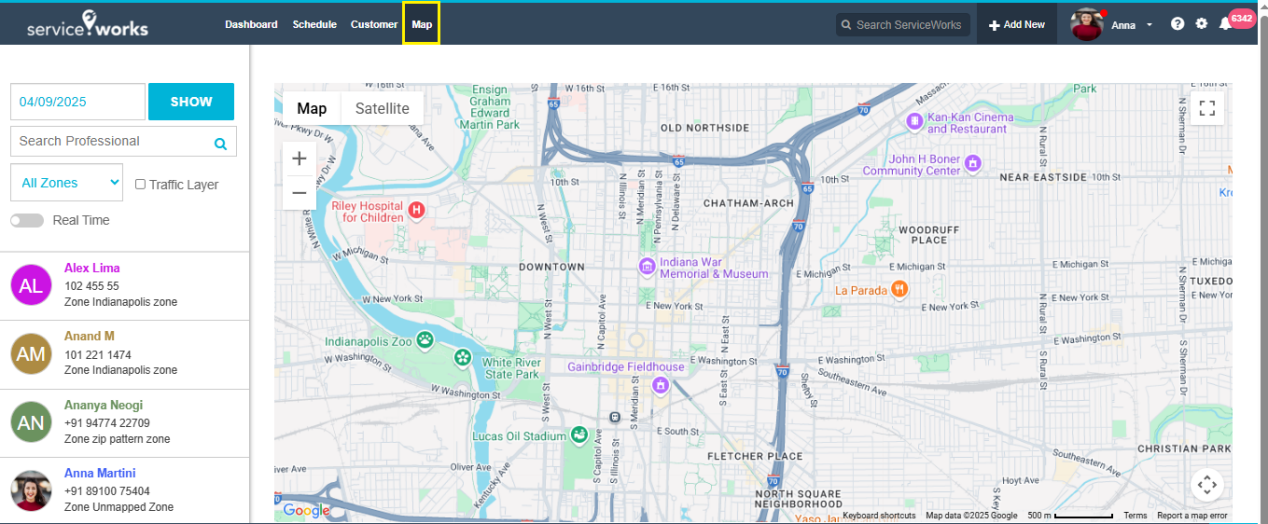
MAP: This section will allow us to configure the visibility of Map & related functionalities (Only View Permission is Given now for Picture).
JOB: This section will allow us to configure the visibility of Job & it’s all related functionalities (Only View Permission is Given now for Picture).
The Item & Product section under JOB will be impacted with the Inventory Permission as shown in the picture below.

Output

Inventory is also showing as Item, Product, Bundle view permission is given.
EMPLOYEE COMMISSION: This section will allow us to configure the visibility of Employee Commission & it’s all related functionalities (Only View Permission is Given now for Picture).
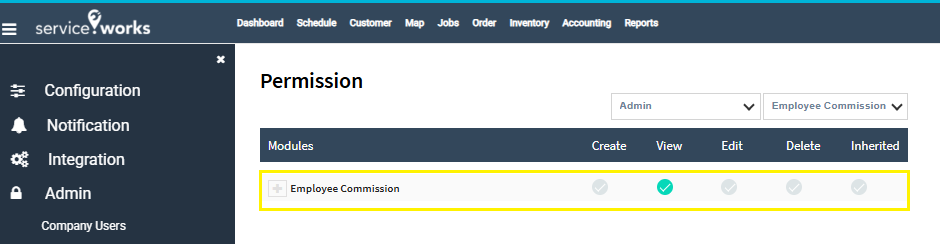
Now the Employee Commission is visible under Accounting in header menu as shown in the picture below.

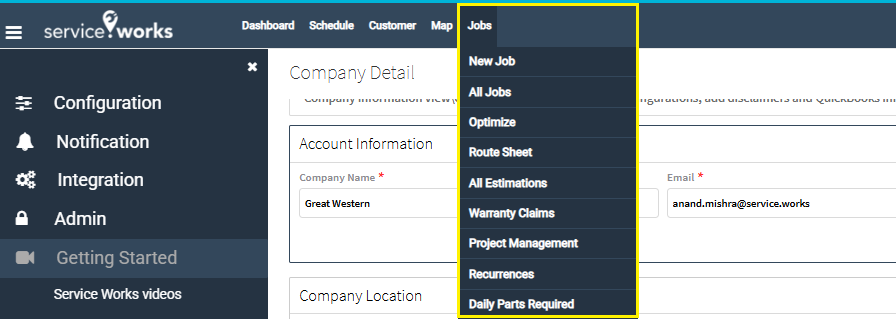
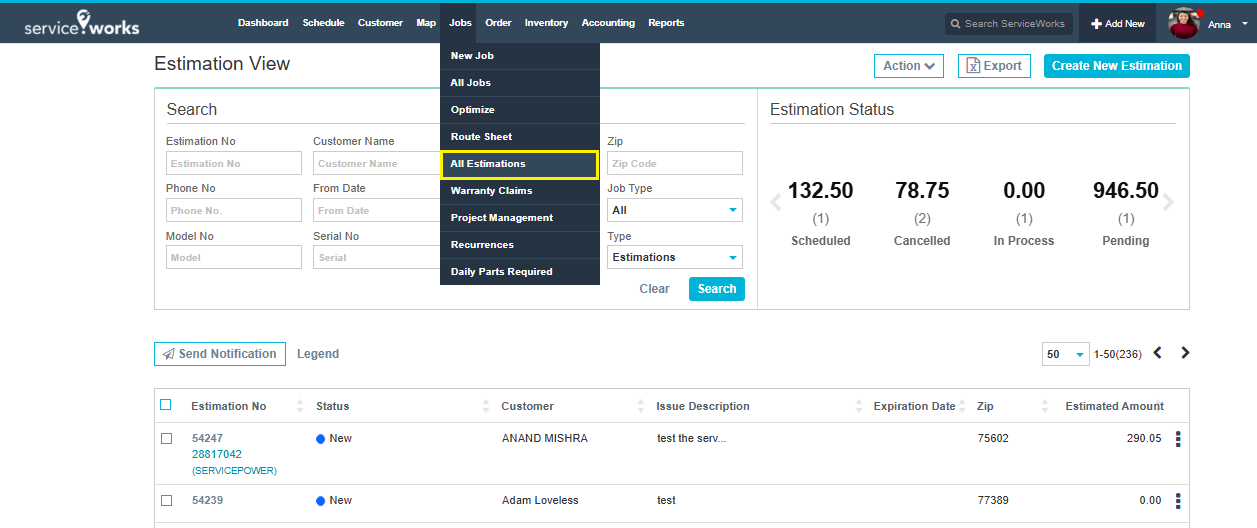
ESTIMATIONS: This section will allow us to configure the visibility of Estimations & it’s all related functionalities (Only View Permission is Given now for Picture).

Output: Now the Estimation is visible under Job in header menu as shown in the picture below.
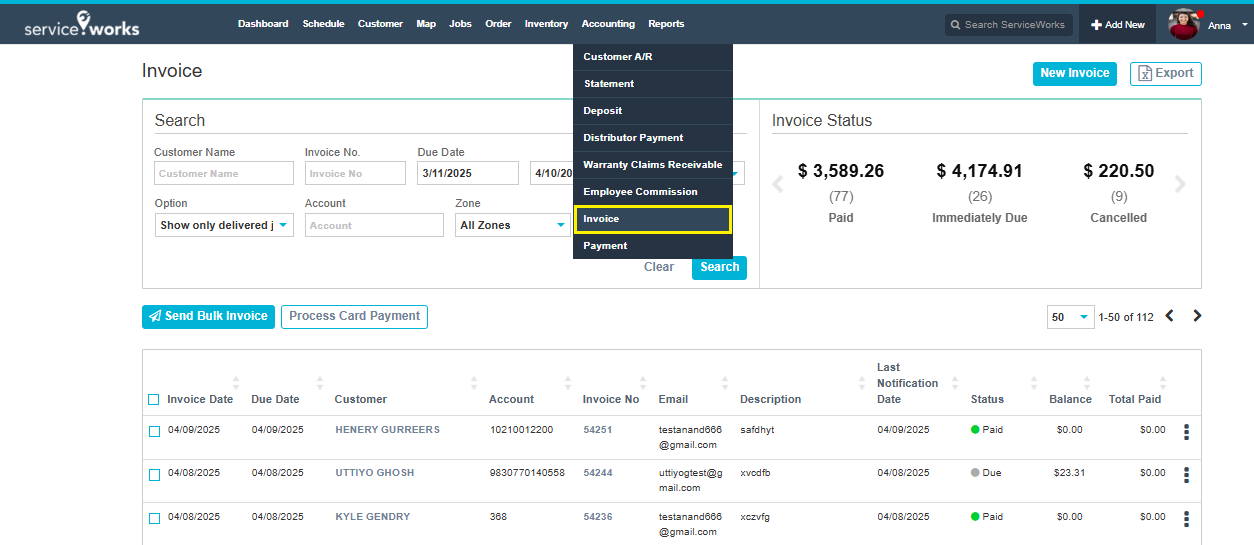
INVOICE: This section will allow us to configure the visibility of Invoice & it’s all related functionalities (Only View Permission is Given now for Picture).

Output: Now the Invoice is visible under Accounting menu as shown in the picture below.
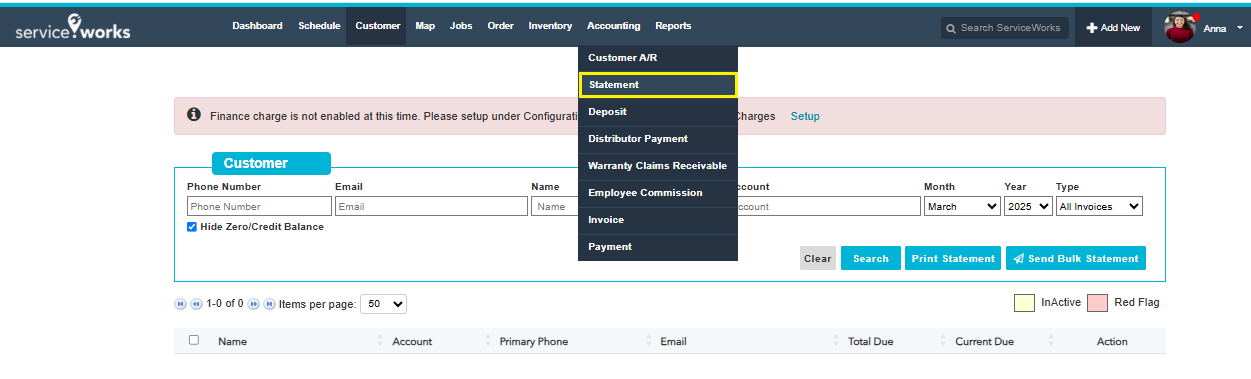
STATEMENT: This section will allow us to configure the visibility of Statement & it’s all related functionalities (Only View Permission is Given now for Picture).

Output: Now the Statement is visible under Accounting in header menu as shown in the picture below.
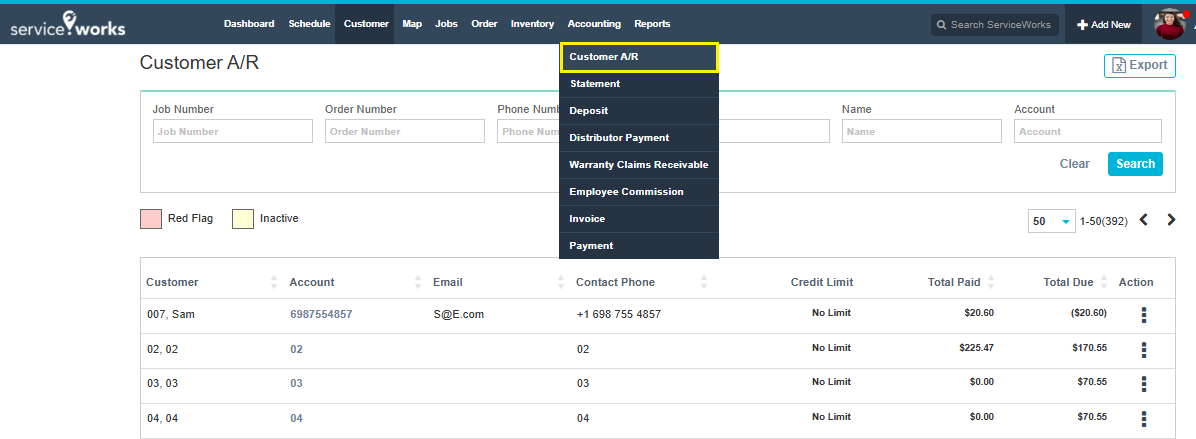
CUSTOMER A/R: This section will allow us to configure the visibility of Customer A/R & it’s all related functionalities (Only View Permission is Given now for Picture).

Output: Now the Customer A/R is visible under Accounting in header menu as shown in the picture below.
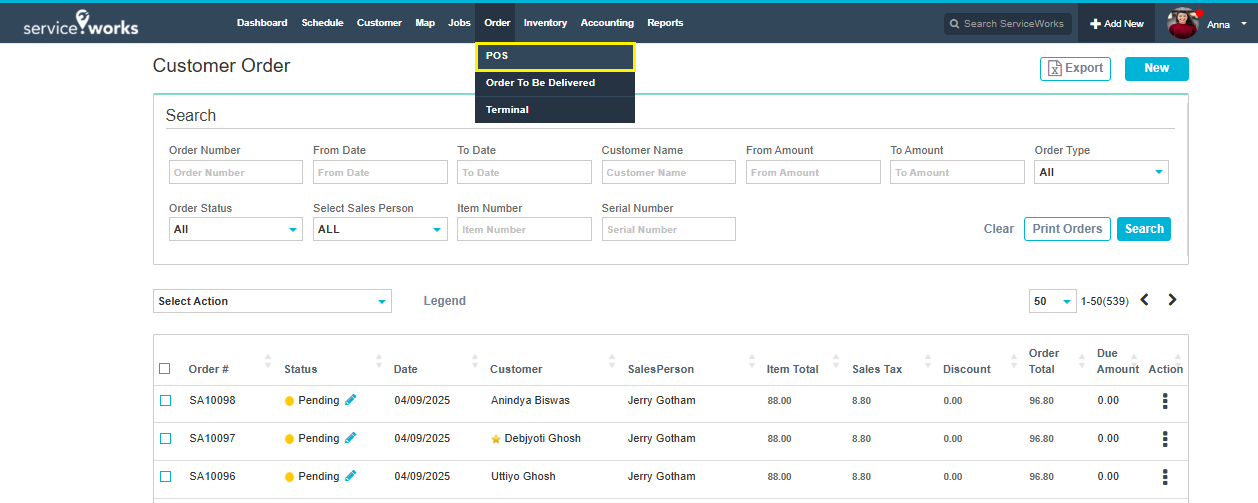
ORDER: This section will allow us to configure the visibility of Order & it’s all related functionalities POS & Order to be Delivered (Only View Permission is Given now for Picture).

Output: Now the Order is visible in header menu as shown in the picture below.
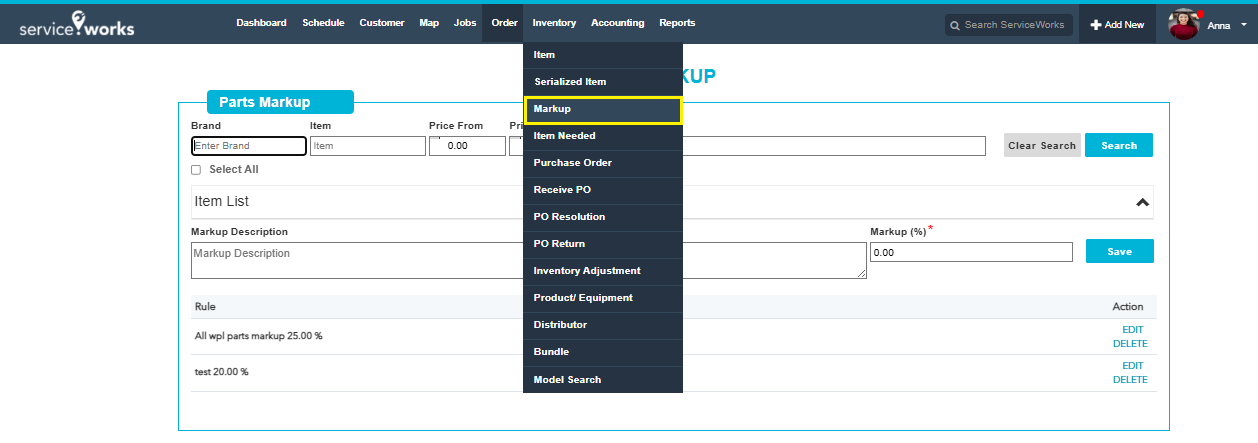
MARKUP: It is placed as an individual Permission Module.
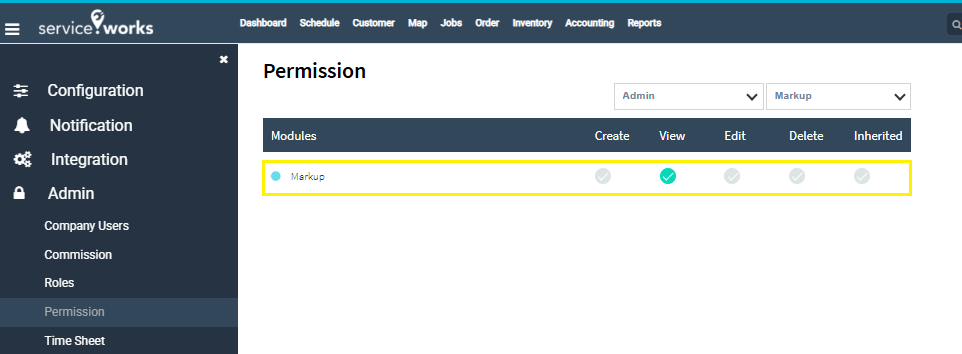
Output: Now the Markup is visible under Inventory in header menu as shown in the picture below.
PURCHASE ORDER: This section will allow us to configure the visibility of Purchase Order & it’s all related functionalities PO, Receive PO, PO Resolution, PO Return, Distributor & Distributor Payment (Only View Permission is Given now for Picture).

Output: Now all the above-mentioned menus is visible under Inventory in header menu as shown in the picture below. 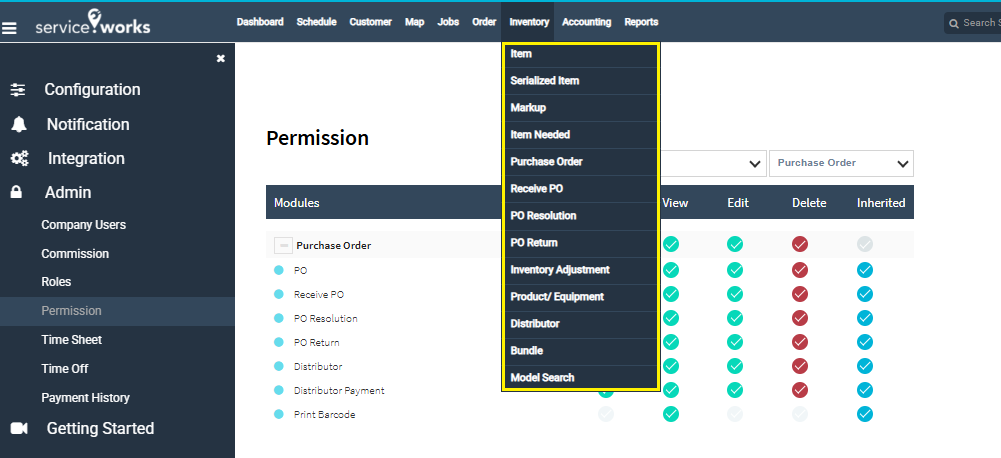
INVENTORY: This section will allow us to configure the visibility of Inventory & it’s all related functionalities Item, Inventory Adjustment, Item Needed & Model Search (Only View Permission is Given now for Picture).
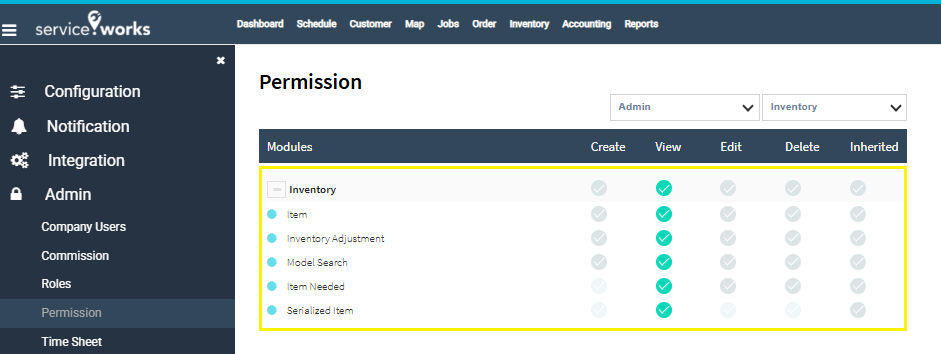
Output: Now Item, Item Needed & Inventory Adjustment menus is visible under Inventory as shown in the picture below.

REPORT: This section will allow us to configure the visibility of Reports (It has only View Permission).
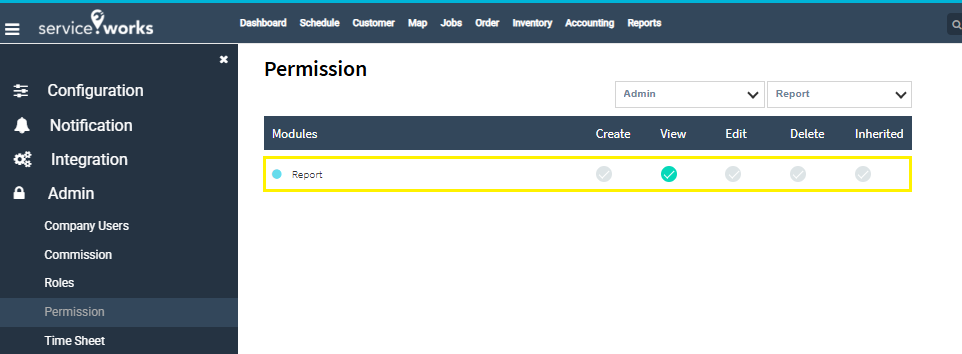
Output: Now the Reports is visible in header menu as shown in the picture below.

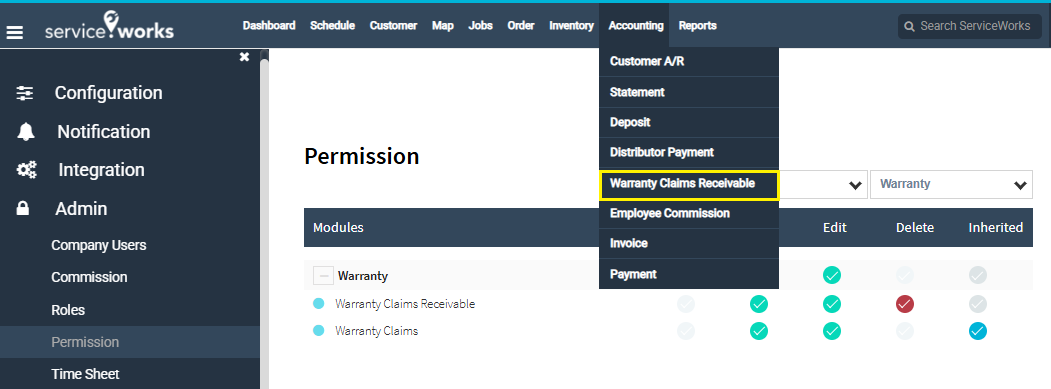
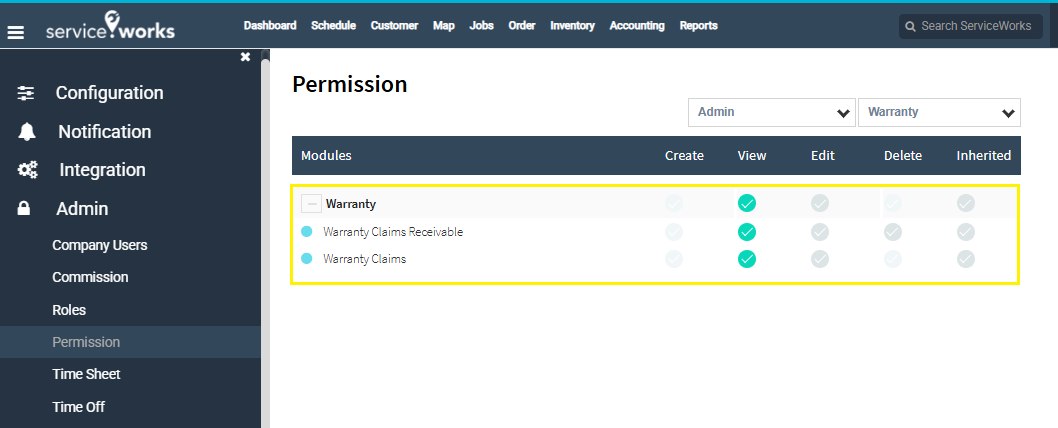
WARRANTY: This section will allow us to configure the visibility of Warranty & it’s all related functionalities Warranty Claims & Warranty Claims Receivable (Only View Permission is Given now for Picture).
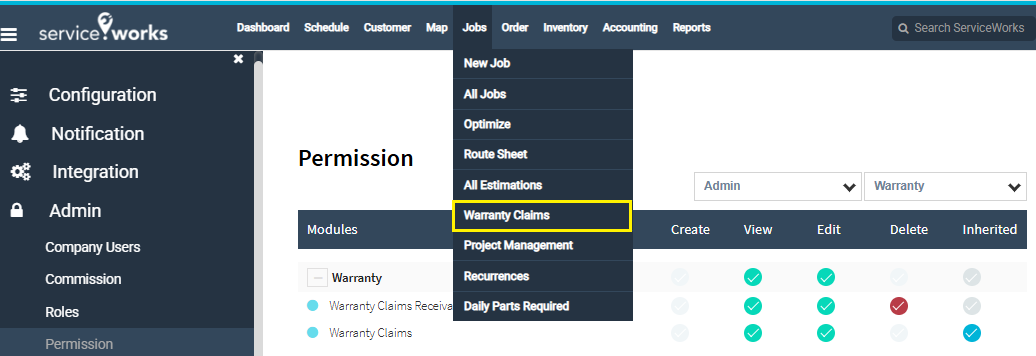
Output: Now Warranty Claims menu is visible under Job in header menu as shown in the picture below.
And Warranty Claims Receivable menu is visible under Accounting in header menu as shown in the picture below.