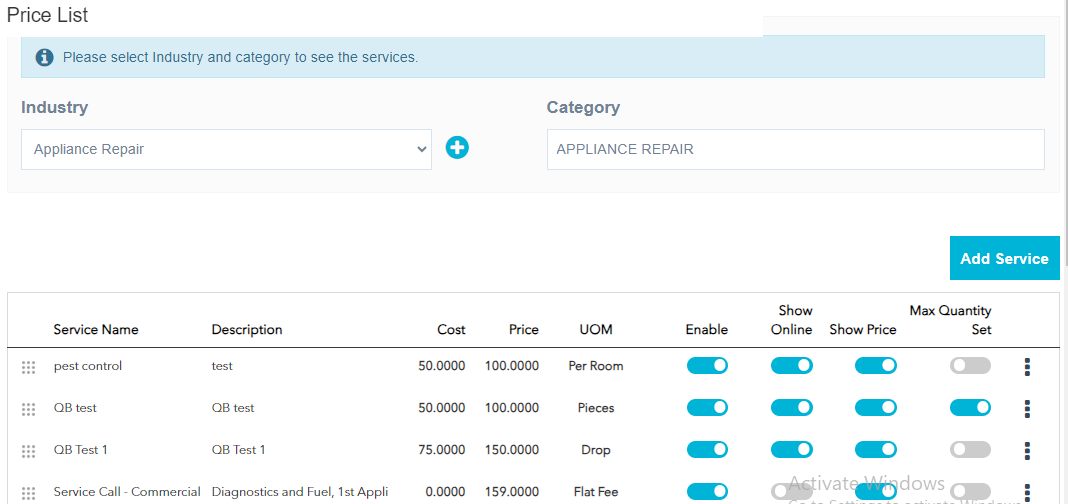
Price List
In ServiceWorks, you’ll have the ability to create a list of the services your business offers with the Price List. This list will also include a description of services, cost, price, and other important information related to your scheduled services. Here’s a brief overview of how to configure this setting within your ServiceWorks software:
Industry
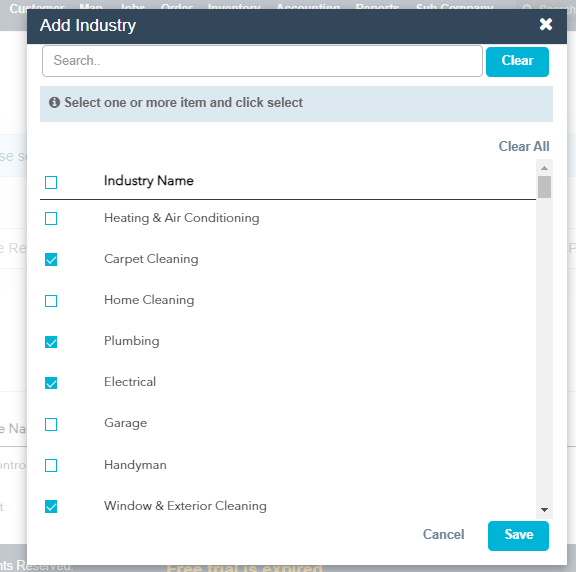
Next, you’ll need to create an industry. You can do so by clicking the “+” button next to the industry drop-down box.

Upon clicking the button, you will be presented with a selection of industries to choose from. You can choose as many or as few as you’d like. We recommend choosing the industries that align closest with your business. Once satisfied with your selections, click Save to continue.
Category
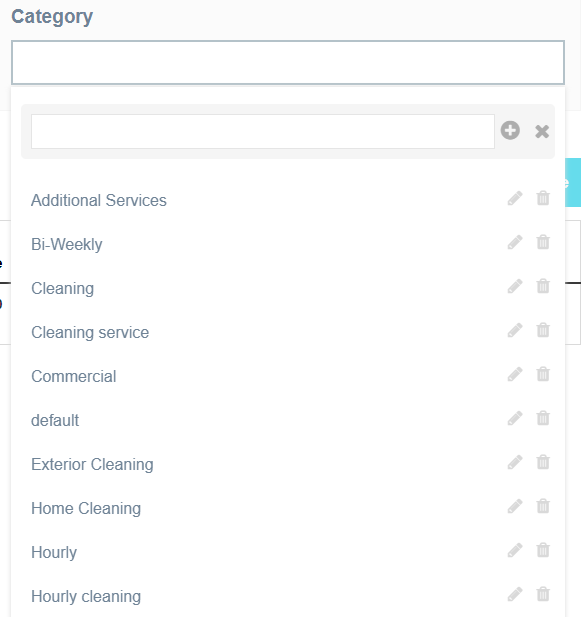
Now that your industry selection is done, you’ll need to select a category to nest your services under. You can do so by clicking on the category name and selecting from the list below. Each industry comes with a list of preset categories, but these can all be edited or deleted as needed using the icons on the side. You can also create your own categories if not listed underneath the industry.
Add Service
Now that your Industry and Category have been set, you can begin to add your services to the Price List. Click the Add Service to get started.
In the following menu, you’ll have the option to set the following parameters for your services:
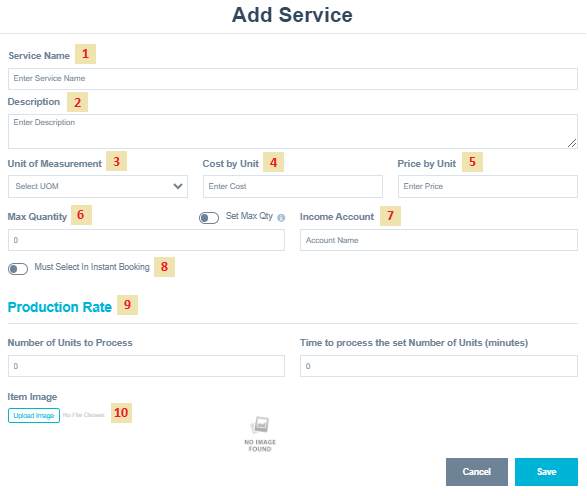
1. Service Name: Add/edit the name of your service
2. Description: Add a description of your service
3. Unit Of Measurement: Define the unit of measurement used for your service (hours, unit, flat rate, etc)
4. Cost by Unit: Designate how much each selected service will cost your business (Note: this field will need to be filled out in order to save services).
5. Price by Unit: Designate the customer sales price for your service
6. Max Quantity: Designate the maximum amount of the service that can be selected per job (refer to this Set Max Quantity on Price List for more information on how this works)
7. Income Account: Enter the name of the income account.
8. Instant Booking Enforcement: Use this toggle to determine whether or not this service must be selected on your instant booking page (more on how that works refer to Enforcing Services in Instant Booking, if applicable).
9. Production Rate: Assign a Production Rate to a service.
10. Item Image: Click on “Upload Image” to upload item image
Once finished adding all of these, click Save to continue.
Now that you have your services set up, they should appear in the previous menu similar to the example below:

Service Name – Displays the name of the service
Description – Displays a description of the service
Cost – Shows the cost of the service
Price – Shows the price of the service
UOM (Unit of Measurement) – Displays the set unit of measurement for a service.
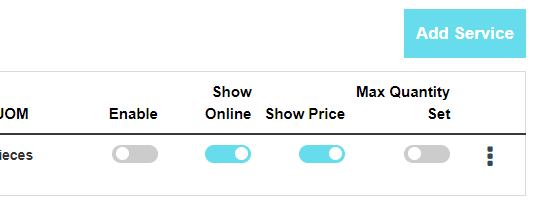
Enable – Use this toggle to enable or disable this service within your settings
Show Online – Determines whether or not this service is visible in your instant booking settings (if applicable)
Show Price – Determines whether or not to display the price when this service is added to jobs/estimates
Max Quantity Set – Enables or disables the max quantity setting for the service (Note: Max Quantity must be set beforehand as the default value is 0)
And now that your service has been properly configured, it should now display all the information related to that service when added to a job or estimate.