Barcode Setting
For a detailed guide on the prerequisites for Barcode Printing, please refer to Tutorial > Printing and Scanning Barcodes.
Now that you’ve enabled access to the barcode printing feature and created an XML code using the third-party software, you’ll now have all the pieces in place to customize the print settings based on the size of your printer.
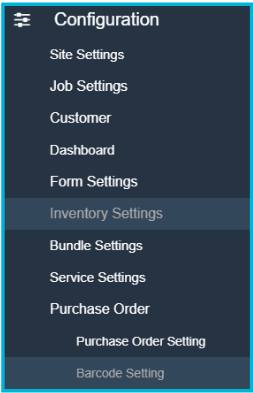
Start by returning to ServiceWorks and opening the Configuration tab by clicking the cogwheel on the toolbar, then navigating to Purchase Order -> Barcode Setting
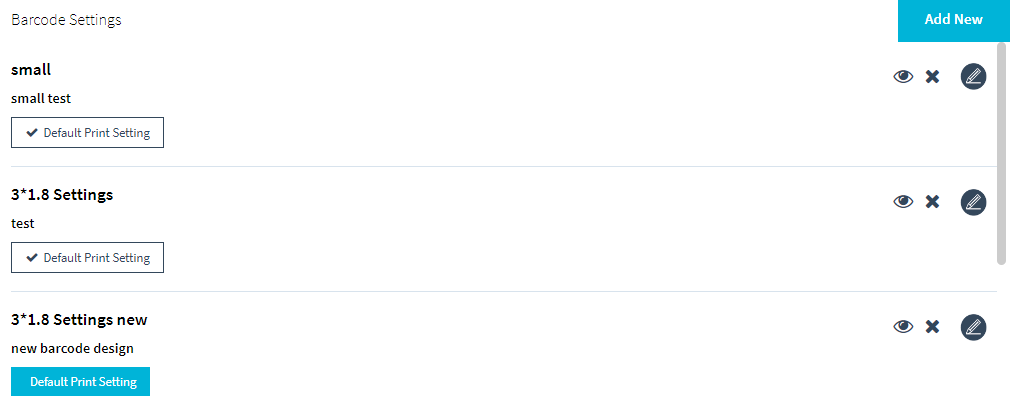
In the barcode setting menu, you can see a list of all the previously created barcode configurations. Each one can be viewed, deleted, or edited using the icons at the end of the row. You can also set a specific barcode setting as the default with the Default Print Setting button.
1. Serialized Item Barcode (Serialized item menu)
2. PRINT Item Bin Barcode (Item grid page under Action button)
3. Item Barcode (item grid page from 3 dots)
5. Location Barcode (Item grid page Action Button)
Creating a new Barcode
To create a new barcode, click the Add New button. Within the add new menu, you’ll have a couple of options for your new barcode setting:
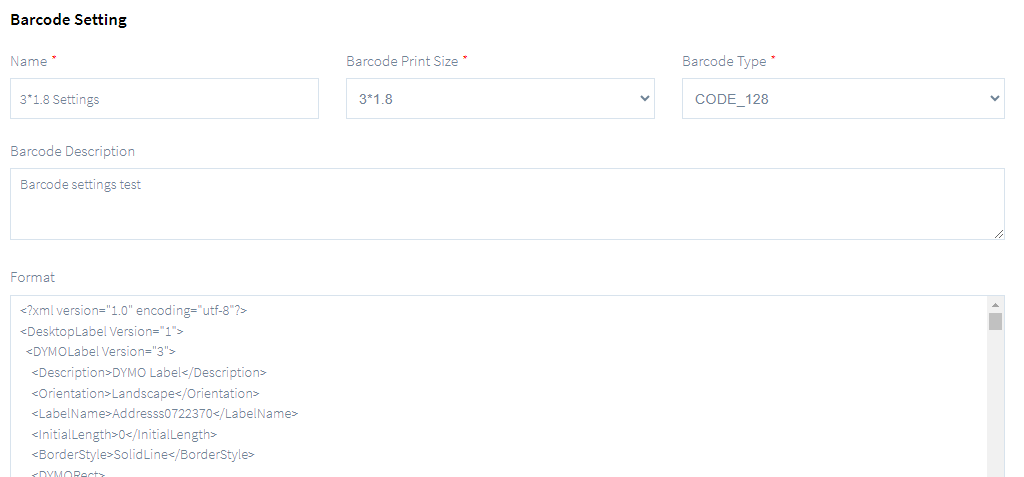
Name: Enter a name for the new barcode
Barcode Print Size: Define the size of your barcode from the dropdown list provided
Barcode Type: Define the type of your barcode from the dropdown list provided
Barcode Description: Enter a description for your custom barcode
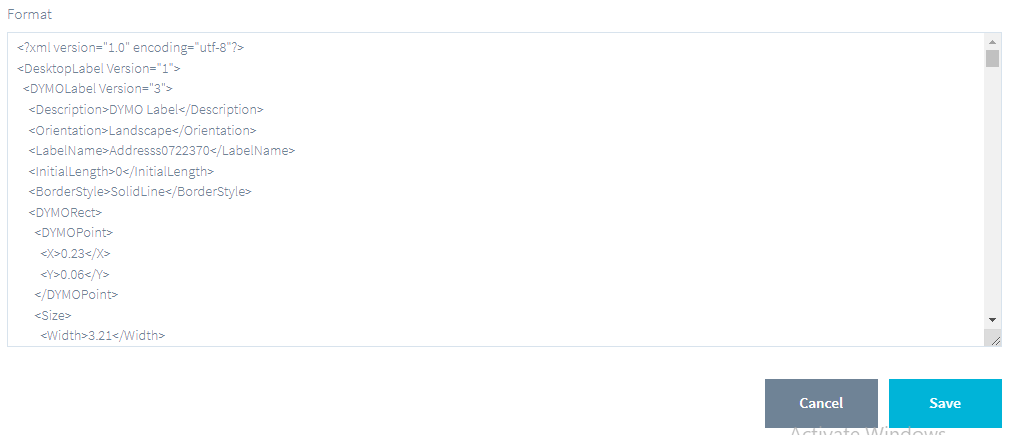
Format: Edit the format of your barcode here. If you’ve created a barcode template using the DYMO Connect software, copy and paste the XML code within this section.
Once all of these fields have been entered, click Save to store your changes. Your newly created barcode should now appear within the saved list of barcode settings.
Note: These steps are for creating standard item barcodes. To create barcodes for your inventory locations, please copy and paste the code below into the Format section of the Barcode Settings menu:
Copy DYMO Label XML
|
<?xml version="1.0" encoding="utf-8"?> <DesktopLabel Version="1"> <DYMOLabel Version="3"> <Description>DYMO Label</Description> <Orientation>Landscape</Orientation> <LabelName>Addresss0722370</LabelName> <InitialLength>0</InitialLength> <BorderStyle>SolidLine</BorderStyle> <DYMORect> <DYMOPoint> <X>0.23</X> <Y>0.06</Y> </DYMOPoint> <Size> <Width>3.21</Width> <Height>0.9966666</Height> </Size> </DYMORect> <BorderColor> <SolidColorBrush> <Color A="1" R="0" G="0" B="0"></Color> </SolidColorBrush> </BorderColor> <BorderThickness>1</BorderThickness> <Show_Border>False</Show_Border> <DynamicLayoutManager> <RotationBehavior>ClearObjects</RotationBehavior> <LabelObjects> <BarcodeObject> <Name>BarcodeObject0</Name> <Brushes> <BackgroundBrush> <SolidColorBrush> <Color A="1" R="1" G="1" B="1"></Color> </SolidColorBrush> </BackgroundBrush> <BorderBrush> <SolidColorBrush> <Color A="1" R="0" G="0" B="0"></Color> </SolidColorBrush> </BorderBrush> <StrokeBrush> <SolidColorBrush> <Color A="1" R="0" G="0" B="0"></Color> </SolidColorBrush> </StrokeBrush> <FillBrush> <SolidColorBrush> <Color A="1" R="0" G="0" B="0"></Color> </SolidColorBrush> </FillBrush> </Brushes> <Rotation>Rotation0</Rotation> <OutlineThickness>1</OutlineThickness> <IsOutlined>False</IsOutlined> <BorderStyle>SolidLine</BorderStyle> <Margin> <DYMOThickness Left="0" Top="0" Right="0" Bottom="0" /> </Margin> <BarcodeFormat>Code128Auto</BarcodeFormat> <Data> <MultiDataString> <DataString></DataString> <DataString>{LocationBarcode}</DataString> </MultiDataString> </Data> <HorizontalAlignment>Center</HorizontalAlignment> <VerticalAlignment>Middle</VerticalAlignment> <Size>SmallMedium</Size> <TextPosition>None</TextPosition> <FontInfo> <FontName>Arial</FontName> <FontSize>12</FontSize> <IsBold>False</IsBold> <IsItalic>False</IsItalic> <IsUnderline>False</IsUnderline> <FontBrush> <SolidColorBrush> <Color A="1" R="0" G="0" B="0"></Color> </SolidColorBrush> </FontBrush> </FontInfo> <ObjectLayout> <DYMOPoint> <X>0.2400001</X> <Y>0.1251042</Y> </DYMOPoint> <Size> <Width>3.18</Width> <Height>0.3803722</Height> </Size> </ObjectLayout> </BarcodeObject> <TextObject> <Name>TextObject07</Name> <Brushes> <BackgroundBrush> <SolidColorBrush> <Color A="0" R="0" G="0" B="0"></Color> </SolidColorBrush> </BackgroundBrush> <BorderBrush> <SolidColorBrush> <Color A="1" R="0" G="0" B="0"></Color> </SolidColorBrush> </BorderBrush> <StrokeBrush> <SolidColorBrush> <Color A="1" R="0" G="0" B="0"></Color> </SolidColorBrush> </StrokeBrush> <FillBrush> <SolidColorBrush> <Color A="0" R="0" G="0" B="0"></Color> </SolidColorBrush> </FillBrush> </Brushes> <Rotation>Rotation0</Rotation> <OutlineThickness>1</OutlineThickness> <IsOutlined>False</IsOutlined> <BorderStyle>SolidLine</BorderStyle> <Margin> <DYMOThickness Left="0" Top="0" Right="0" Bottom="0" /> </Margin> <HorizontalAlignment>Center</HorizontalAlignment> <VerticalAlignment>Middle</VerticalAlignment> <FitMode>AlwaysFit</FitMode> <IsVertical>False</IsVertical> <FormattedText> <FitMode>AlwaysFit</Fit |
Click the Preview icon to see if your format is correct and click Default Print Setting to make it as default.

1. Serialized Item Barcode (Serialized item menu)
2. PRINT Item Bin Barcode (Item grid page under Action button)
3. Item Barcode (item grid page from 3 dots)
5. Location Barcode (Item grid page Action Button)
1. Serialized Item Barcode (Serialized item menu)
{ItemNumber}
{ItemDescription}
{WarehouseName}
{DistributorName}
{GrnNumber}
{GrnDate}
{poNumber}
{PODate}
{ItemPrice}
{InvoiceNumber}
{BrandName}
{BracodeNumber}
{Brnd}
{$ItemCost}
{ItemCost}
{SerialNumber}
{SLNO}
{SLNumber}
{serialnumber}
{slnumber}
{slno}
2. PRINT Item Bin Barcode (Item grid page under Action button)
{LocationBarcode}
{locationbarcode}
{LocationName}
{locationname}
{Brand}
{brand}
{BrandName}
{brandname}
{BrandAbbrv}
{brandabbrv}
{ItemNumber}
{itemnumber}
{ItemDescription}
{itemdescription}
{PrintDate}
{printdate}
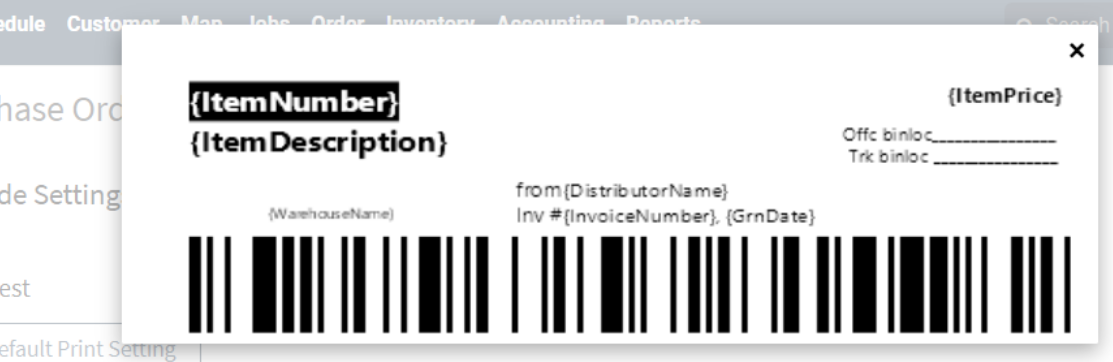
3. Item Barcode (item grid page from 3 dots)
{ItemNumber}
{ItemDescription}
{ItemPrice}
{BrandName}
{BracodeNumber}
{Brnd}
{$ItemCost}
{ItemCost}
{ItemNumber}
{ItemDescription}
{WarehouseName}
{Location}
{DistributorName}
{GrnNumber}
{GrnDate}
{poNumber}
{PODate}
{ItemPrice}
{InvoiceNumber}
{BrandName}
{BracodeNumber}
{Brnd}
{$ItemCost}
{ItemCost}
{Job#}
{JobNumber}
{Ticket#}
{TicketNumber}
{CustomerName}
{ReceivedDate}
{LastTripTechnician}
{Claim#}
{CLAIM#}
{ClaimNumber}
{TrackingId}
{TrackingNumber}
{TrackingNo}
5. Location Barcode (Item grid page Action Button)
{LocationBarcode}
{LocationName}