Claim Processors Setup
Here’s a brief walkthrough on how to configure and use ServiceBench within the ServiceWorks software.
To begin, click the cogwheel in the toolbar to open the configurations tab and navigate to Integration -> Claim Processors Setup

Click + icon , "Claim Processor" popup will open.
In the following popup menu, You’ll be given the option to fill out the corresponding information for your ServiceBench account:
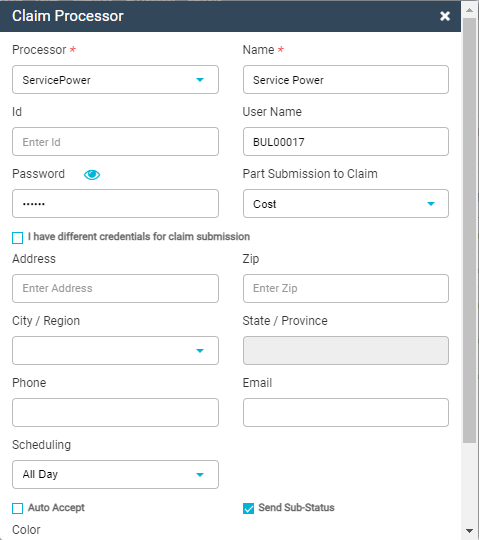
Processor: This field lets you create or select an existing processor. Since this is your initial setup, you’ll want to put ServiceBench in this field.
Name: This field will designate how your processor appears in ServiceWorks. For ease of use, we recommend naming this ServiceBench as well.
Service Administrator: Select the warranty provider from which claim submission through ServiceBench will happen.
Click the + icon to add Service Administrator with Id and name.
ID: You can enter your processor’s associated ID number here.
Username: Enter your ServiceBench username in this field.
Password: Enter your ServiceBench password here.
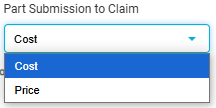
Part Submission to Claim – In this field, you can designate whether to base the submission on the cost or sales price with your claims.
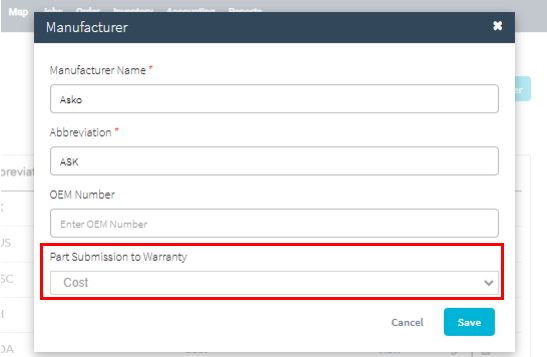
If in ServiceBench, ‘Part Submission to Claim’ is ‘Cost’ and in Manufacturer setup in ServiceWorks (Configuration > Inventory Settings > Manufacturer), ‘Part Submission to Warranty’ is set as ‘Cost’ then warranty claim will be submitted in cost.
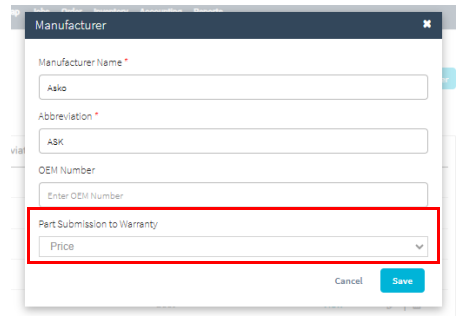
But If in ServiceBench, ‘Part Submission to Claim’ is ‘Cost’ and in Manufacturer setup in ServiceWorks (Configuration > Inventory Settings > Manufacturer), ‘Part Submission to Warranty’ is set as ‘Price’ then warranty claim for part will be submitted in price.
Address: Enter the Processor’s address here.
Zip: Enter the processor’s associated zip code/pattern.
City: Enter the processor’s associated city.
State/Province: Displays the state or province associated with either the city or zip code field.
Phone: Enter an associated phone number for your processor here.
Email: Enter the email address associated with the processor.
Auto-Accept: Enable this box to have your ServiceBench jobs be automatically accepted into ServiceWorks when posted.
Send Sub Status: When enabled, this allows Service Works to update the job status on the ServiceBench side.
Sync Claim Status & Payment: Enable this toggle to synchronize payments made to ServiceBench.
Color: This can be used to change the color coding of your ServiceBench jobs on the schedule
Once finished, click Save to continue.
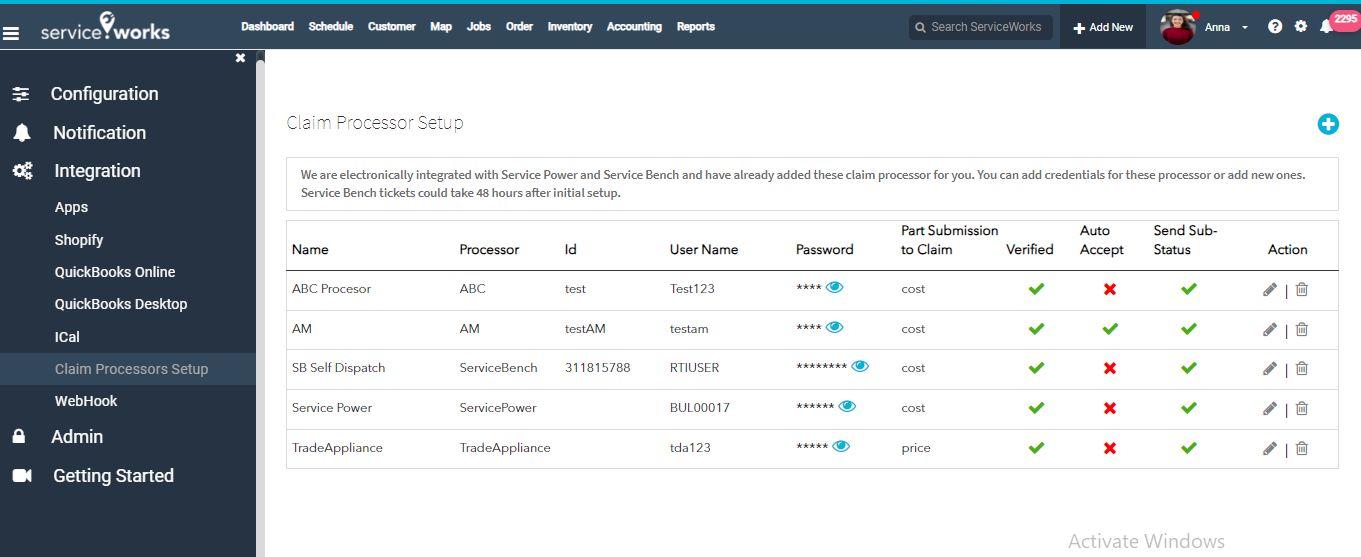
Once saved, you’re claim processor list should be similar to the example below. Each of the green checkmarks validates that the feature is enabled or your account has been verified.
Note: When we create users in ServiceBench it will show usernames with dispatches in the schedule board in ServiceWorks.