Instant Booking
Within ServiceWorks, you have the ability to set up a separate booking page for your customers, similar to your website, where they can requests your business’ service without having to speak to a representative. This page can also be used to streamline your scheduling process, saving time and energy along the way. Here’s a series of tutorials detailing how each part works.
You can design your instant booking template here.

- Enable/Disable – This will determine whether or not this page is active on the web
- Copy – Use this to create a copy of your current instant booking page
- Share – This will generate a URL link to either share directly to customers or embed into your website to create a link to the instant booking page. You can also use this to enable an availability widget for potential customers (more on that here)
- Preview – This allows you to view your instant booking page as if you were a customer requesting services
- Edit – This takes you to the edit menu for your instant booking page
If this is your first time creating your instant booking page, click on the Add New button in the upper right corner to get your instant booking page started. If you’ve already created one, click on the Edit icon to follow along with this step by step guide.
Different tabs under instant booking page are as follows:
- Page
- Brand
- Banner
- What We Do
- Customer
- Services
- Product/Equipment
- Schedule
- Zone
- Payment
- Confirmation
- Presentation
The first portion of the Instant Booking page will allow you to enable / setup the following:
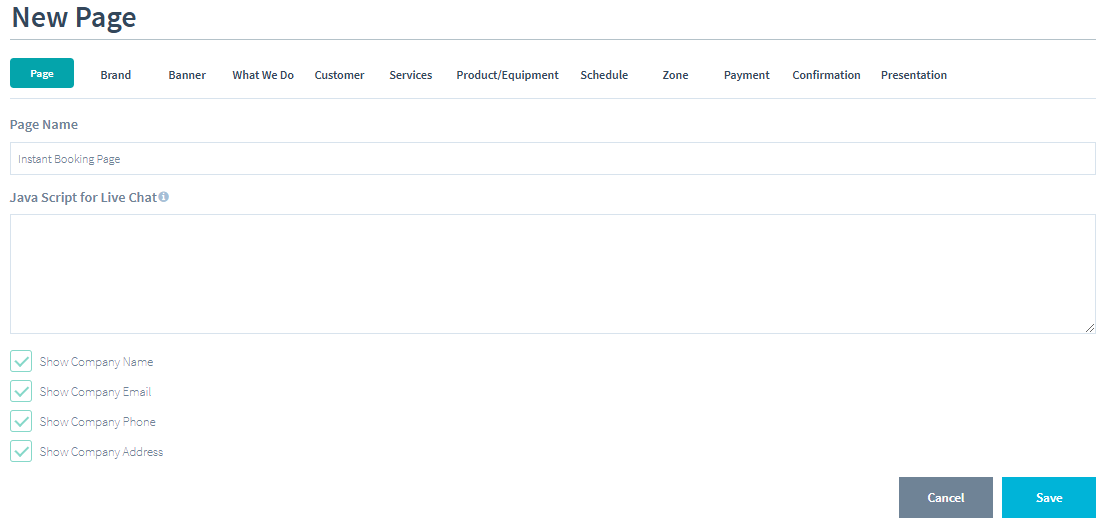
- Page Name – Create a name for your instant booking page. This name will be how you differentiate between your setup instant booking pages
- JavaScript for Live Chat – In this section, you can paste JavaScript code to embed code into your instant booking page. (Note: you may need to consult with your webmaster about using this field as ServiceWorks doesn’t offer setup assistance with this feature)
- The ability to display your company’s email, phone, and address
Once finished with your edits, click Save to log your changes.
(Note: Be sure to save after making any changes within the instant booking page, as it will not remind you to do so or save the changes if you leave the page)
Within your instant booking settings, you can customize how your page appears with the Brand section. Here’s what you can setup within this menu:
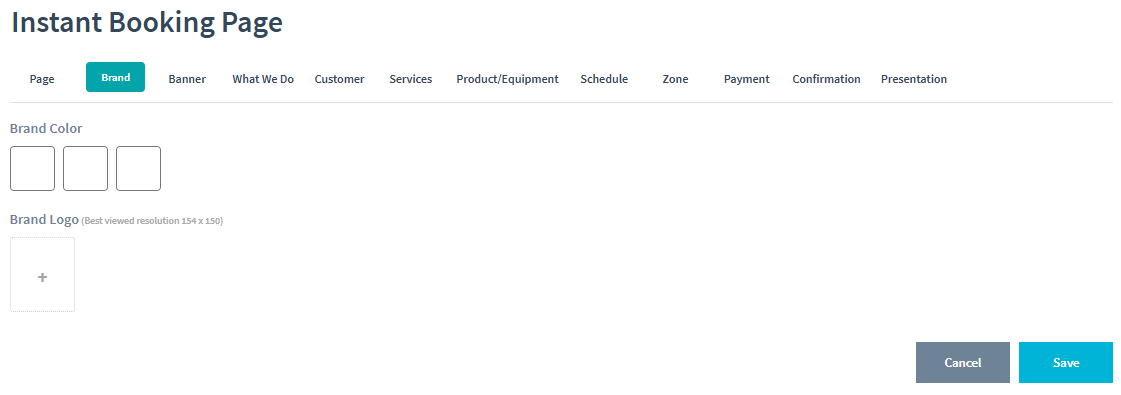
- Brand Color – Use this to add your company’s color scheme to your instant booking page by either RGB number or hex code.
1st Box – Changes the color of your page’s header and Next button
2nd Box – Changes the color of your “Back“ button
3rd Box – Changes the color of your service selection buttons
We strongly recommend changing these panels to something other than white, as it will make the buttons on your instant booking page difficult to see. - Brand Logo – Allows for a logo to be uploaded to accompany your instant booking webpage. This logo appears alongside the top of your instant booking page.
Once finished with your color selections and upload, click Save to log your changes.
(Note: Be sure to save after making any changes within the instant booking page, as it will not remind you to do so or save the changes if you leave the page)
In the banner tab, we’ll go over what can be added with this portion of the instant booking page:
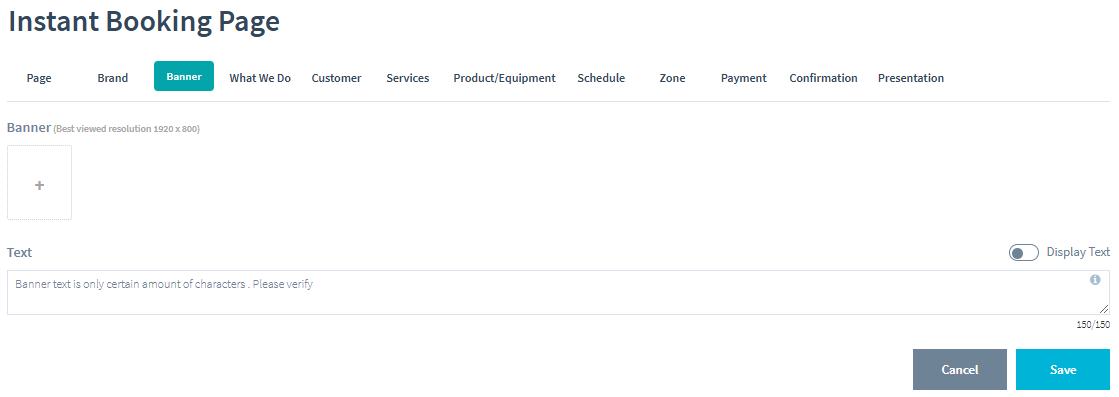
- Banner – Lets you upload a banner image for your instant booking webpage. This banner will appear at the top of your instant booking page.
- Text – Input text to go along with your banner here. This text will display similar to a tagline directly underneath the banner. Be aware that there is a character limit of 150, so try to make sure your desired text falls within that number count. You can also use the Display Text toggle to enable or disable the text on the page.
Once finished with your entries, click Save to log your changes.
(Note: Be sure to save after making any changes within the instant booking page, as it will not remind you to do so or save the changes if you leave the page)
In the What We Do page, you can set up your instant booking to display a series of images and text explaining the details of your services. This section, when enabled, will display directly above where your customers will enter their address for service. Here’s a brief overview of the functions on this page:
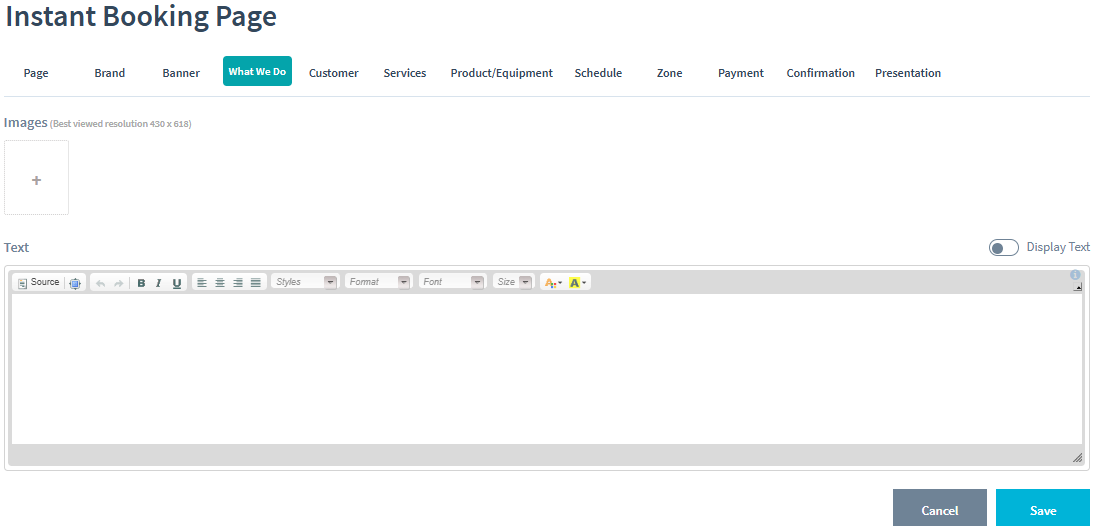
- Images – Here you can upload pictures that correspond to your services. The images uploaded to this section will display in a slideshow to the left to the text field.
- Text – Enter text about your services here. You can also use the Display Text option to enable or disable any text within this field.
Once finished with your edits, click Save to log your changes.
(Note: Be sure to save after making any changes within the instant booking page, as it will not remind you to do so or save the changes if you leave the page)
Next, we’ll go over what can be setup within the Customer tab of the instant booking page:
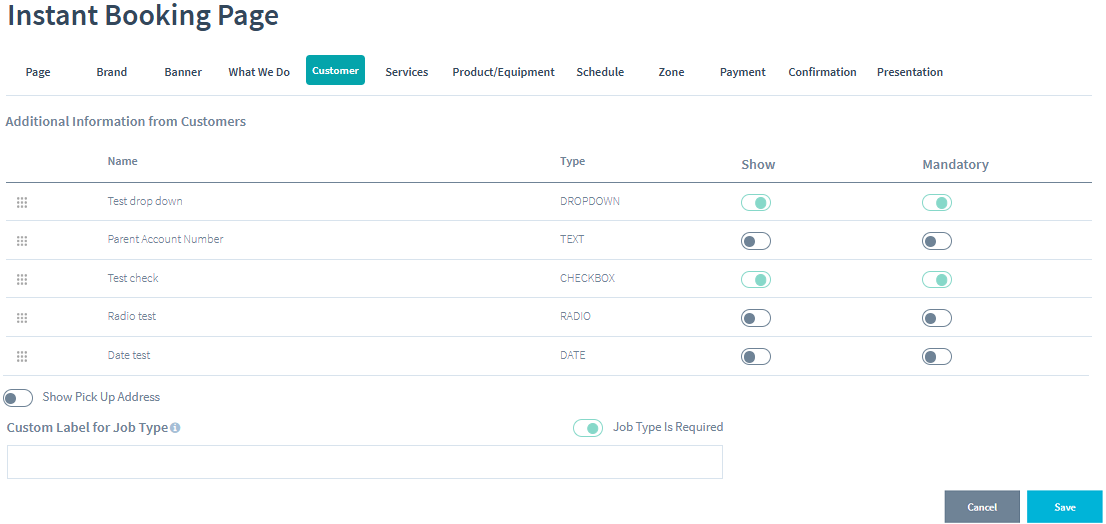
- Additional Information from Customers – Here is where you will see a list of all the custom fields as well as the types of entry fields set up within your Job Settings. You can use the dot grid on the left to reorder the way they are displayed on the instant booking page.
On the right, you have the ability to enable or disable visibility for your custom fields with the Show option, as well as enforce completion of these fields in order to move forward with scheduling the service by enabling the Mandatory option. - Show Pick Up Address – When enabled, allows for a separate pick up address (or service address depending on your business needs) to be provided during service signup
- Custom Label for Job Type – Here you can create a custom label for your job types when customers request services through the instant booking page (i.e. Select Your Desired Service). The default for this field is “Job Type”, so take some time to customize the phrasing for your business needs.
Once finished with your edits, click Save to log your changes.
(Note: Be sure to save after making any changes within the instant booking page, as it will not remind you to do so or save the changes if you leave the page)
In the Services tab, you can create and edit the list of services available through your instant booking page. Let’s go over the settings within this page:
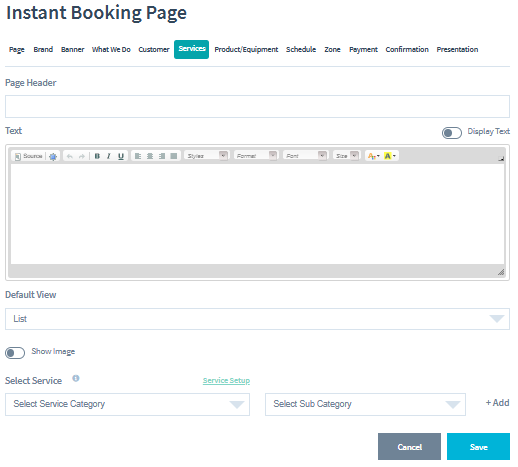
- Page Header – Enter a name for your Services page here. If left blank, this section WILL NOT appear in your instant booking page.
- Text – In this field, you can enter text that gives a brief explanation about your services. You can use the Display Text option to either enable or disable the visibility of the text in this field
- Default View – Here you can determine whether your services are displayed in a List view or a Grid view.
- Show Image – Enable/Disable the visibility of associated images with each service.
- Select Service – Here you can add services to be selected from your Price List by Category and Sub Category (Service Name in Price List). You can also use the Service Setup link to directly access and edit your Price List. Be sure to click the Add button so that you can save your changes.
Once finished with your additions, click Save to log your changes.
(Note: Be sure to save after making any changes within the instant booking page, as it will not remind you to do so or save the changes if you leave the page)
In the Product/Equipment tab, you can select brand and add products by selecting product family and product: Let’s go over the settings within this page:

- Page Header – Enter a name for your Product/Equipment page here. If left blank, this section WILL NOT appear in your instant booking page.
- Text – In this field, you can enter text that gives a brief explanation about your Product/Equipment. You can use the Display Text option to either enable or disable the visibility of the text in this field
- Model is mandatory – Enable if you want model to be mandatory for your product/equipment
- Serial is mandatory – Enable if you want serial to be mandatory for your product/equipment
- Select Brand – Select the brand of your product/equipment and click +Add to add this
- Product Family – Select the Product Family of your product/equipment and click +Add to add this
- Product – Select the product/equipment and click +Add to add this
With the Schedule tab, you can setup how your customers schedule services from the instant booking page. Here’s a brief explanation of how it functions:
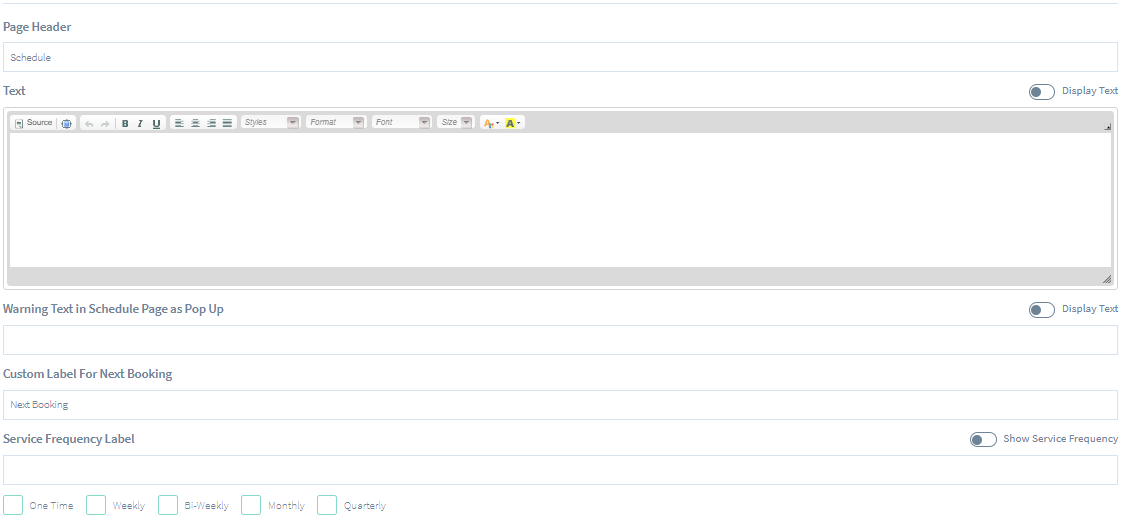
- Page Header – Set a name for your scheduling page here
- Text – Enter text about your scheduling here. You also have the ability to enable/disable the text with the Display Text option
- Warning Text – Use this field to enter a popup message that appears BEFORE an appointment can be scheduled. This can be toggled on or off with the Display Text toggle above it.
- Custom Label For Next Booking – Use this to edit the label name for the next booked service
- Service Frequency Label – Use this section to both edit and enable the frequency label for your services page. Use the Show Service Frequency to toggle the visibility of the labels and the bottom checkboxes to enable or disable the types of service frequencies that can be selected
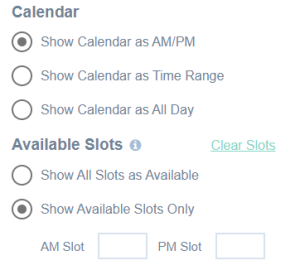
Calendar Settings
At the bottom of the page, there are some settings that related to the time slots available for your customers to use. Here’s an explanation on what each one does:
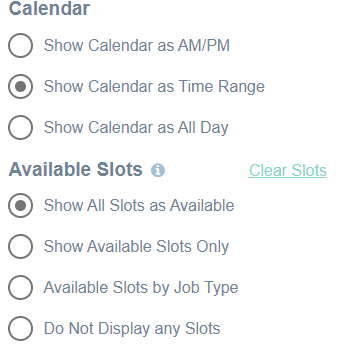
- Show Calendar as AM/PM – Displays your schedule to where customers can choose either an AM or PM appointment time based on your hours of operation.*
- Show Calendar as Time Range – Displays your schedule by the time ranges setup within your Service Settings
- Show Calendar as All Day – Displays your scheduled calendar as the day of service and NOT a time.
- Show All Slots as Available – Allows all time slots to be displayed and selected regardless of if there’s an opening
- Show Available Slots Only – Only displays the time slots for which there hasn’t been a scheduled service for
- Available Slots by Job Type – Displays available time slots by Job Type associated with each service
- Do Not Display any Slots – Disables the ability to have your customers select a specific date and time for their services. Use this option if you’d like for your customers to be able to request services but schedule them according to your staff availability
Once finished with your edits, click Save to log your changes.
When Using the “Show Calendar as AM/PM” and “Show Available Slots,” you can also set a limit on how many AM or PM slots are available to choose from. This will ensure that you can manage the amount of service requests without overbooking or being overwhelmed on time constraints
(Note: Be sure to save after making any changes within the instant booking page, as it will not remind you to do so or save the changes if you leave the page)
In the Zone section, you can designate your area of intended service by setting up zones in your instant booking page. Here’s a brief explanation of how these option work:

- Page Header – Customize the name for your Zone page. If left blank, this section WILL NOT appear in your instant booking page
- Text – Here you can enter a message related to your zone setup
- Zone Image – Here you can upload an image of your intended area of service
- Enable Zone Restriction – Toggle to enable/disable the zone restrictions within ServiceWorks. The zones can be defined within the Zone Setup link. You can also use the Draw Your Zone link to be directed to Google Maps, where you can outline your area of service for the image upload
- Assign Tech by Zone – Enabling this will allow you to assign technicians by the zones they have assigned within their User Settings.
Once finished with your edits, click Save to log your changes.
(Note: Be sure to save after making any changes within the instant booking page, as it will not remind you to do so or save the changes if you leave the page)
In the Payment section, you can configure the settings for how payment is taken through your instant booking page. Here’s what each section does:
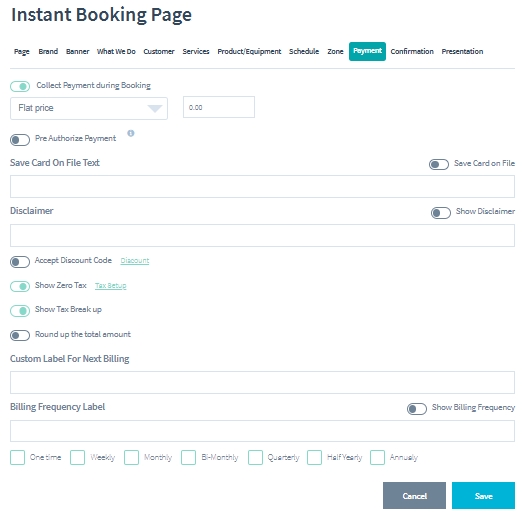
- Collect Payment During Booking – This toggle will determine whether your customers will need to pay for their services before scheduling them or be invoiced at a later date. When enabled, you have the ability to choose between a Flat Price or Percentage to take as payment.
- Pre Authorize Payment – Enabling this will pre authorize a charge to the card used for payment. The amount charged will be processed upon completion of the service.
Note: The pre-authorization function will not work if you are using Square as your payment gateway - Save Card on File – Enabling this toggle will save the card used for payment to the customer’s information within ServiceWorks for future transactions. In the text field beneath it, you have the option of creating a message related to having your customers save their card information.
- Show Disclaimer – Enabling this toggle will allow for your configured payment disclaimer to be displayed at the end of the payment screen. This will occur if the “Collect Payment during Booking” or “Pre Authorize Payment” toggles are set to ON. Alternatively, you can use the field below to display a custom disclaimer message specific to your instant booking page and process (click HERE for more info)
- Accept Discount Code – Here you can enable the use of discount codes during checkout. Use the Discount Setup link to configure your discounts.
- Show Zero Tax – This toggle enables whether or not to display the associated taxes during check out. Use the Tax Setup link to create tax rates if you haven’t already.
- Round Up the Total Amount – Use this to round up the amount due during payment to the nearest whole number.
Note: To process payments without savnig a card on file, set the Collect Payment During Booking to ON, then disable the Save Card on File
The next two options are only if you plan on allowing your customers to choose when they are billed for services (i.e. Monthly, Weekly, and Quarterly payments). If you don’t plan on doing so, you can leave the following blank and continue on to the next section.
- Custom Label for Next Billing – Here you can customize a message about the next expected date of billing (i.e.: “Your next payment will be processed on:” )
- Billing Frequency Label – When enabled, gives your customers the option to choose their billing cycle. Use the text field below to create a message (i.e.: “Choose your method of billing”) relating to the billing frequency. You can use the boxes below to enable which types of billing cycles can be selected.
Once finished with your edits, click Save to log your changes.
(Note: Be sure to save after making any changes within the instant booking page, as it will not remind you to do so or save the changes if you leave the page)
The confirmation page in your instant booking page that your customers will see when requesting services. There’s 1 of 2 options you can setup from within this page:
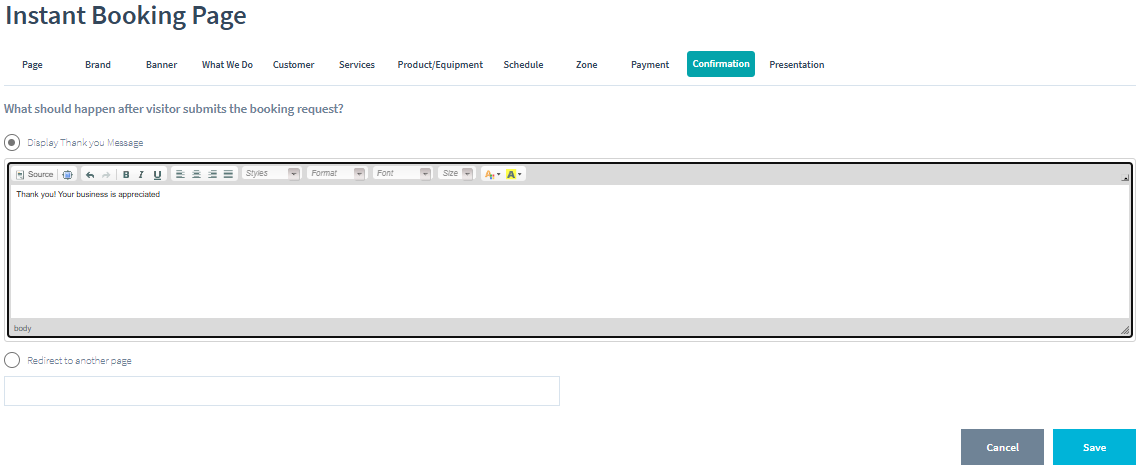
- Display Thank You Message – When selected you can input a thank you message that appears once payment has been accepted. Your customers will need to close this page once it appears, as it does not lead to any other page.
- Redirect to Another Page – When selected, you can enter in a URL to direct your customers to once the service has been scheduled.
The presentation page is the last part of your instant booking page that your customers will see when requesting services. There’s 1 of 2 options you can setup from within this page:
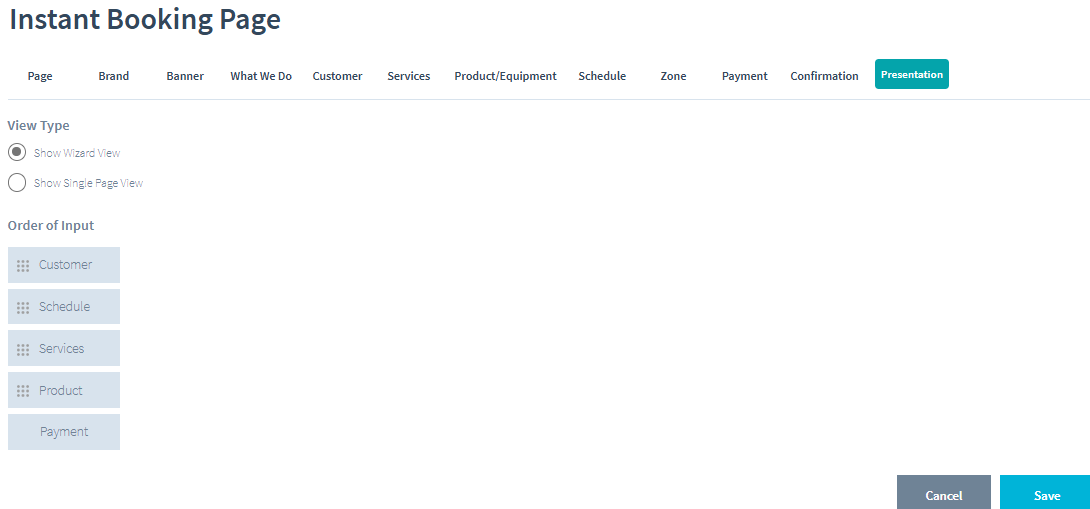
- Show Wizard View – When selected you can set your instant booking web page with multiple pages for each steps.
- Show Single Page View – When selected you can set your instant booking web page with a single page.
- Order of Input – You can change the order of inputs for your instant booking page using drag and drop.